# Request Response (RWC)
Use this step to send a message to an end user in a specified Rich Web Chat conversation and wait for a response. Step works together with the Wait for Chat (RWC) step template. When step is reached during flow execution, it sends the message to the chosen conversation and proceeds down the next exit after receiving user’s reply.
# Message content
To create the outgoing message, choose an input component and fill in the necessary information. Each component’s settings and limits are described in the input component field under the Info icon.
A text message has no limit on the number of characters and will not be truncated. However, for user-friendly purposes, the suggested limit is 320 characters. The field can be defined manually and using merge fields (click on the {x} icon). Note that using merge field values makes the length of a message unknown.
You can format the text by inserting HTML into the message, for example:
Look it up on <a href='https://onereach.ai/'> OneReach.ai</a>!
It will create a link for "OneReach.ai".
Also, you can use HTML tags and inline CSS styles to customize text or add images.
To insert an active URL in the text, use http:// or https://.
The preview message button allows you to see how the user will see the message in the chat.
Submitted user's reply can be edited by the user. The user's latest message has an Actions menu, which will be shown when a user hovers over the message. The Actions menu contains Copy and Edit elements. By clicking on Copy button the text content inside the user response will be copied to the clipboard. By clicking on Edit the user can "resend" their reply. All messages below the edited one will be deleted and re-sent.
# Render attachment as medias or files
There are two options how to display attachments: as medias or as files:
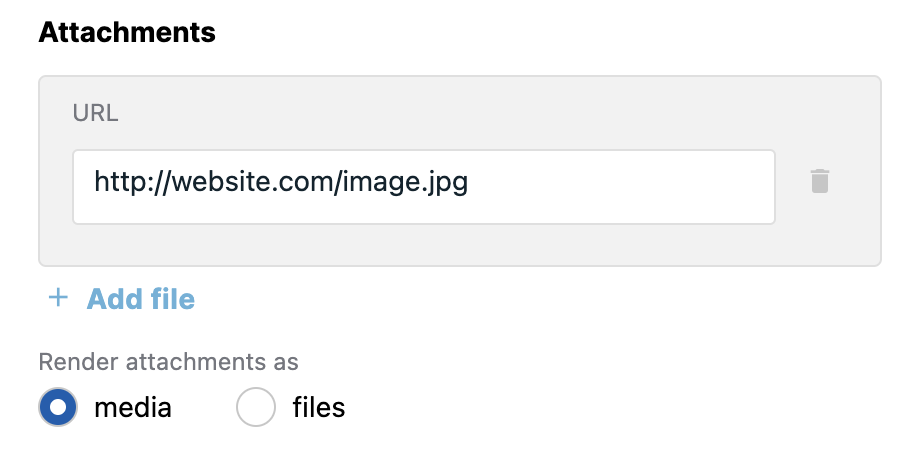
If 'media' option is selected, attachments, that can be parsed as medias - images, videos and audio files, will be joined and transformed. Images in the RWC UI will be wrapped into gallery component with zoom and save options. Video and audio files will be presented as a media player. If it's not possible to parse file as a media file, it will be presented as a default file.
If 'files' option is selected, every file asset will be presented as a file, including images and videos.
# Allow manual user response
An option to allow the user manually type their reply instead of choosing a predefined input component is available. Turning it on will add a new manual response exit to the tree, and the flow will proceed down that exit if the user chooses to reply with a text message.
Note that for Text and files input component the user is expected to manually type their reply. In this case this option is on by default, and the flow will proceed down the next exit.
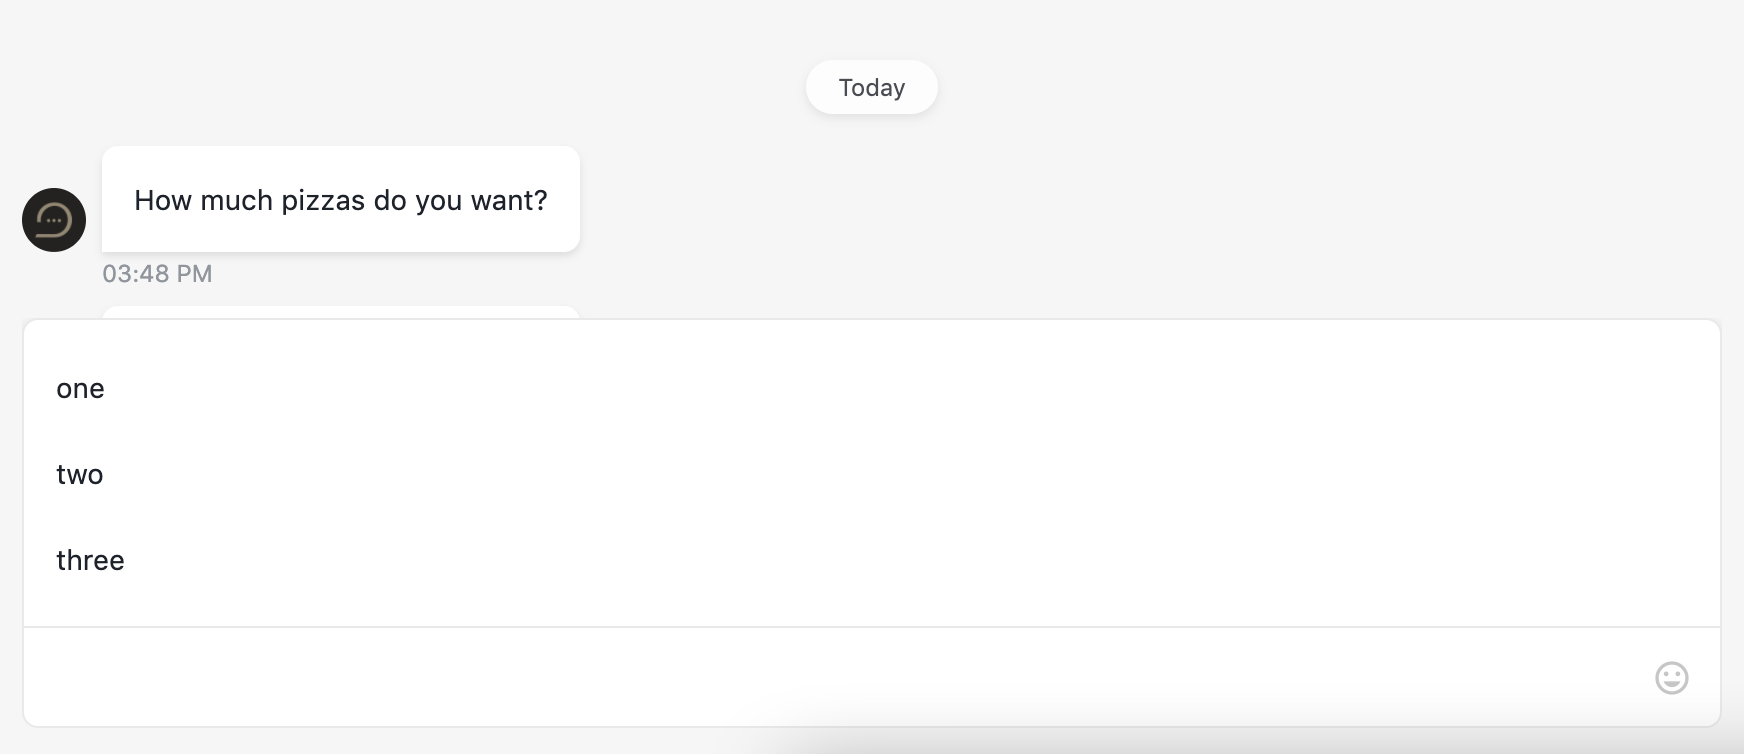
# Suggested options creation method
Manual user response can contain predefined answers to provide the user with auto-suggestions for his reply. Options can be set using step UI (by switching Suggested options creation method to Create list) or set dynamically via merge field (by switching Suggested options creation method to Set values dynamically). These suggestions will appear after the user focuses on the text input field of the chat.
# Input type
Text input component supports several input types:
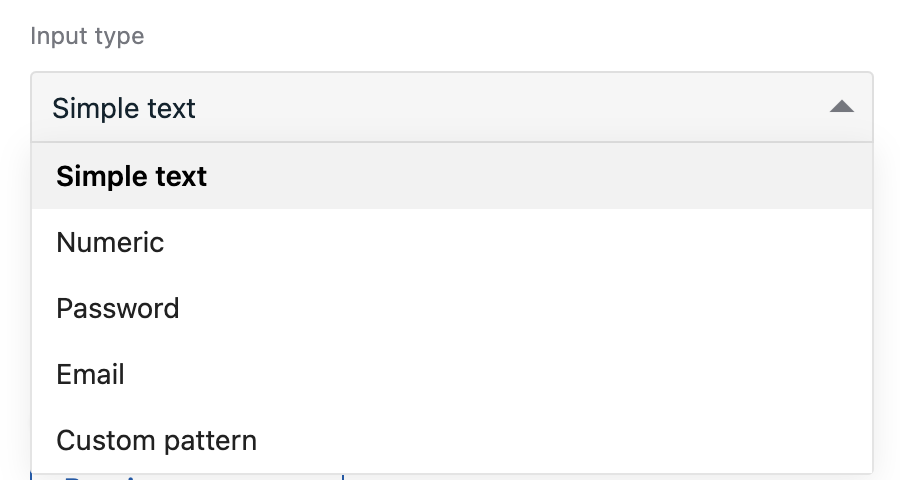
# Numeric
Allows user to enter only numbers
# Password
User reply will be hidden by *
If a user has any saved emails in the browser they'd be suggested to autofill
# Custom pattern
Custom pattern allows only to add formatting for requested data and doesn't provide validation for it. To specify pattern symbol use next chars:
# - only digits (0-9)
X - [0-9a-zA-Z]
S - [a-zA-Z]
A - [a-zA-Z] will transform to UPPER CASE
a - [a-zA-Z] will transform to lower case
! - escape char pattern and use as a regular symbol
# Merge field structure for dynamic and code mode for static suggestions:
[
  { text: `one` },
  { text: `two` }
]
# Validation
When Text input component is chosen or Manual user response toggle is turned on – you can add validation for the user response by turning on a toggle Add validation.
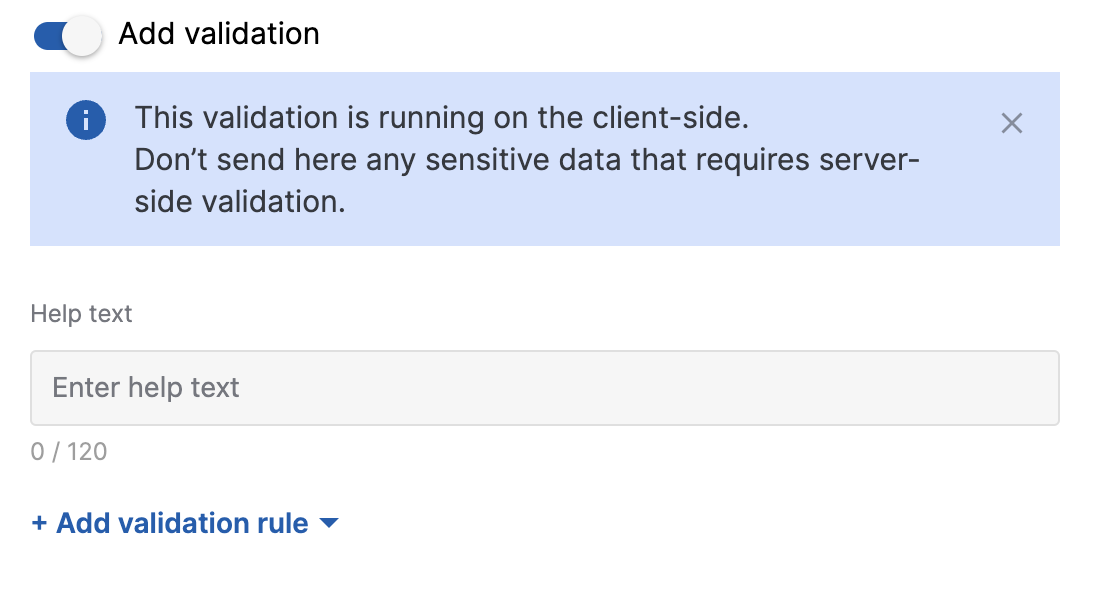
TIP
The validation is running on the client-side. It means that server-side couldn't completely trust that checks and it's still needed to recheck sensitive and critical things in the flow. Also, it means that it's unsafe to pass some data like passwords in validation functions or custom validation variables.
For one Request-Response step is available one help text (it will be under the text input) and many rules for validations. Validation is activated after the submission of input element, and error state is removing after any input.
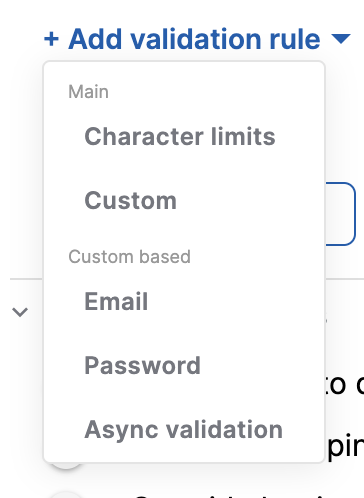
There are two types of rules for now: Character limits and Custom.
Other types are based on custom and exist as for using as for being an example of the functionality.
Validation stops after the first not valid condition and the error message for this condition is shown above the input.
TIP
There could be conflict situations between these functionalities:
- validation
- input type
- predefined text
- suggestions
Be careful about exclusionary conditions in these options.
# Character limits validation
This type of validation allows us to validate:
minimum
maximum
minimum and maximum
exact number of characters in the user's reply.
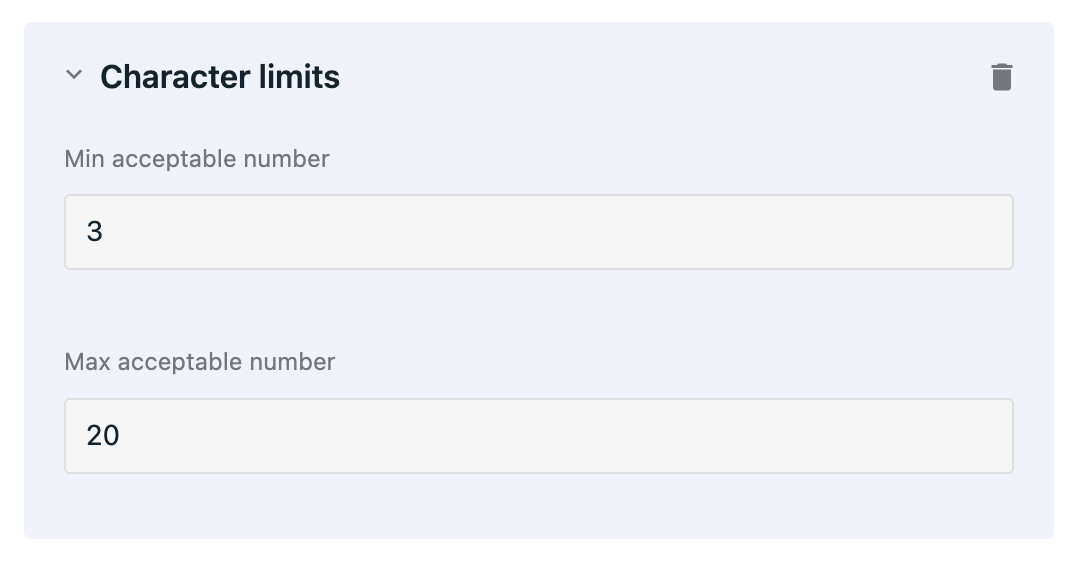
At least one field is required
For the exact number of characters fill both fields with the same number
There could be just one
Character limitsrule for a stepThe error messages here are predefined and couldn't be changed
The client-side in error condition of this would be like this:

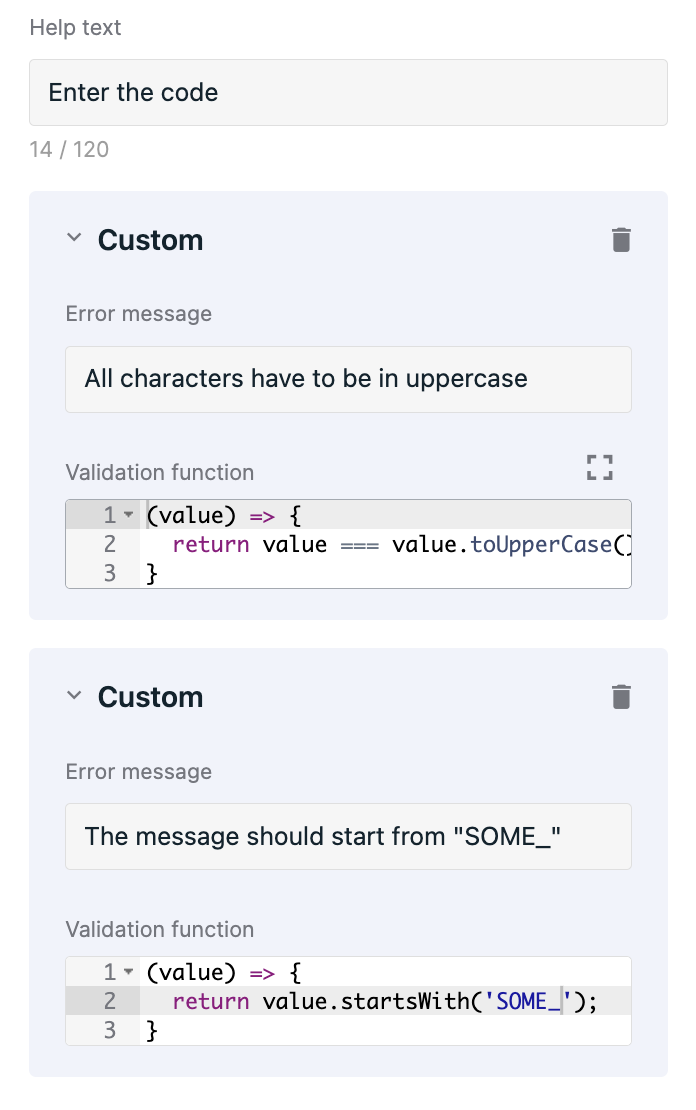
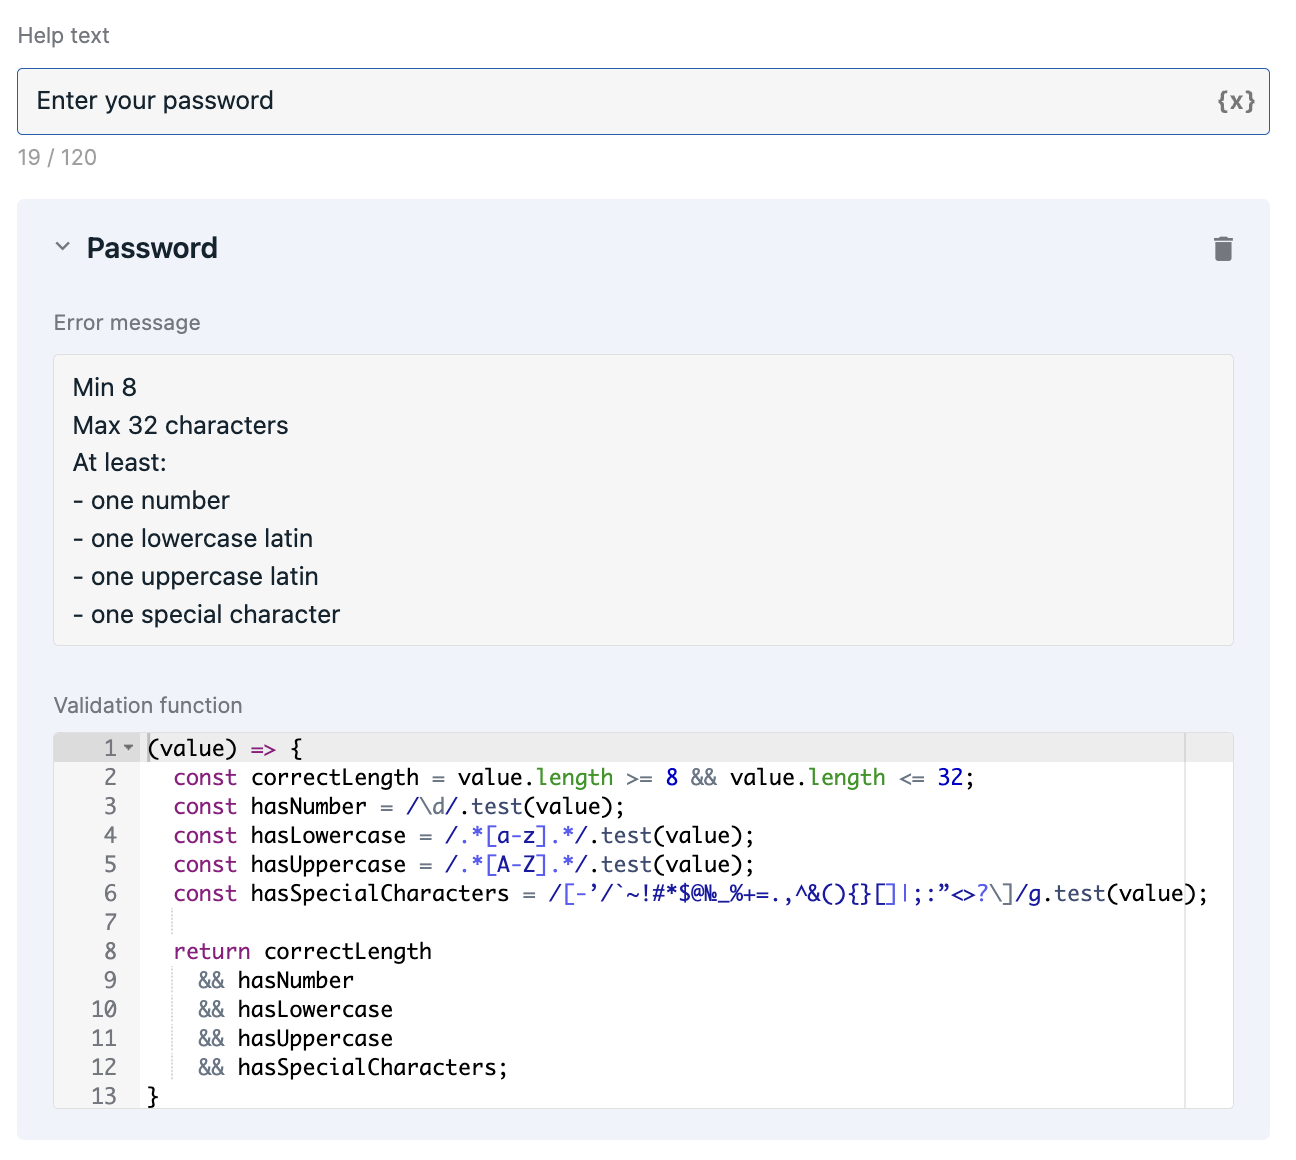
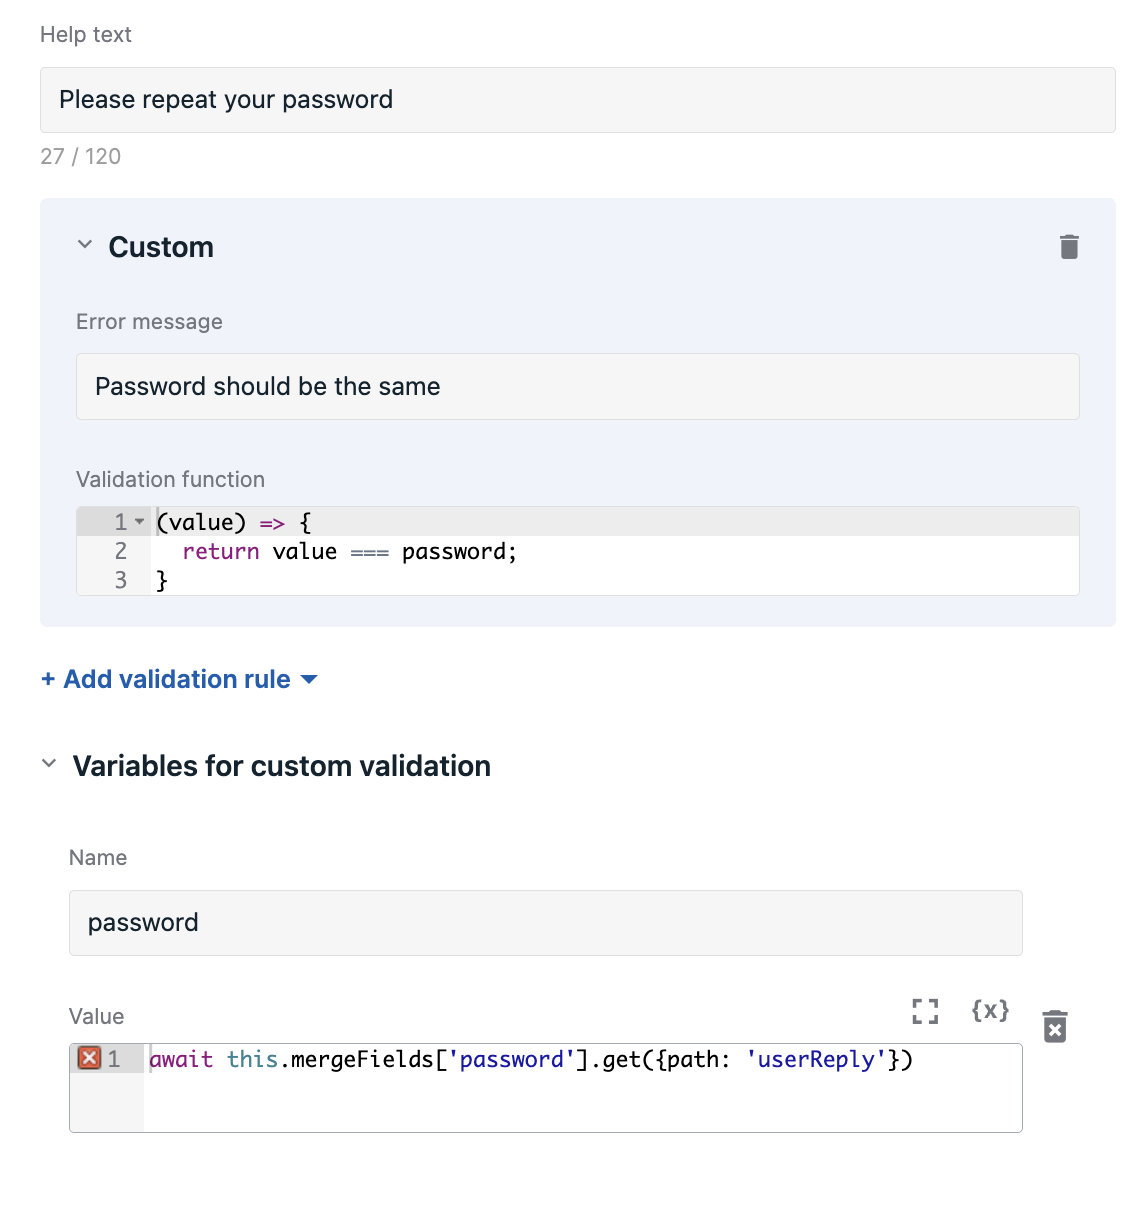
# Custom validations
It is possible to write your custom validation functions with a custom error message for each. There is no limited number of custom validation. There are a few predefined examples of custom validation ("Email", "Password", "Async validation"). You can use them directly or base your own validation on them by changing predefined values (but templates wouldn't change for future use).
What is possible:
- using basic js syntax, write additional functions inside the main one
- using async/await
- using built-in basic js asynchronous functions like
fetchorsetTimeout - using external API with
fetchsyntax (the example of using it is inAsync validationitem in the menu for adding the new validation rule) - use variables that we pass in "Variables for custom validation" block (it's appearing when you choose at least one custom validation)
- change a predefined custom function
- using multiline syntax for the error message
What is not possible:
- importing anything, using external npm modules
- using merge fields in the validation function directly (but you can pass them in "Variables for custom validation" and use those variables in a function)
If you use async validation rules they are running synchronously (one after one) without creating the race condition.
You can use character limits validation along with customs.

# Custom validation variables
Since we have some restrictions in the validation function, passing variables here could be helpful.
Merge fields are available here.
Value has to be a valid js-expression.
If you have a few custom validations these variables are available in each of them.
Examples:
To request 4 last credit card digits, use pattern: !#!#!#!# !#!#!#!# !#!#!#!# !#!#!#!# ####
When end-user adds digits (e.g. 4444) , text input and submitted data will contain : #### #### #### 4444
To request phone number for specific country code, use pattern: +1 (500) ###-##-##
When end-user adds digits (e.g. 1234567) , text input and submitted data will contain +1 (500) 123-45-67
# Advanced settings
# Allow message reaction (Like/Dislike)
Turn on the toggle to let the chat user leave Like or Dislike reactions to this message as well as additional feedback in case of Dislike.
When the feature is enabled it creates the like and dislike legs for the Step. If the like or dislike leg has any RWC Steps, this leg must end with the Go to a Step in Current Flow or the Return to Main Thread (RWC) Step. If the like or dislike leg does not have any Steps or has non-RWC Steps, no need to add extra Steps to reroute a chat user to the main thread because no RWC message exchange takes place in this like or dislike leg.
Find details at Turn on Like and Dislike user reactions to the message article.
# Send message in view mode
Some components have a view mode. In this mode, the chat doesn't wait and couldn't have any reply from the user. Basically, it's like sending a message but using request-response components.
Available components:
- Cards
- Checkboxes
- Radio buttons
- Range or single points (slider)
- Date
- Geolocation
- Audio playback
- Video playback
- Reorderable list
WARNING
Enabling this mode doesn't turn off any required fields or any validations. Even if they are not showing or used with the view mode.
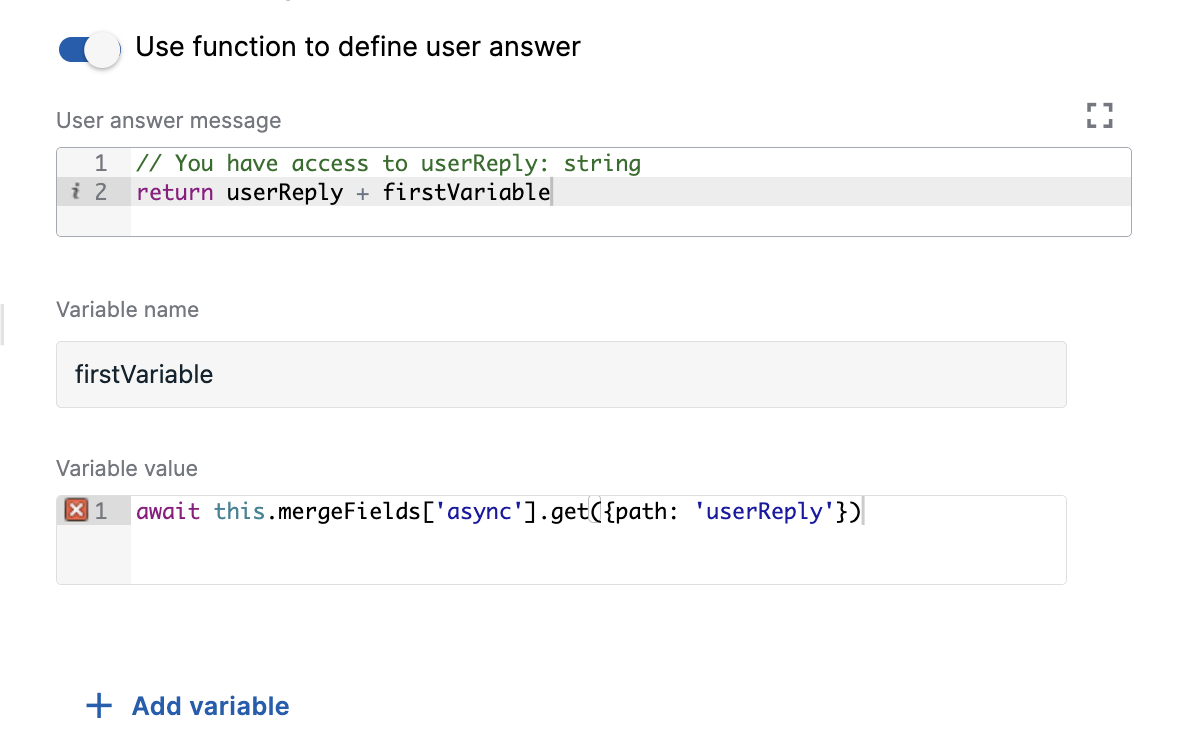
# Use function to define user answer
Allows to override default answer by custom message.
TIP
Affects only user reply message appearance in messages flow, do not alter merge field data.
TIP
Does not change message contents if user replied with text input.
TIP
Does not have access to merge fields, but you can add variables below where you can pass merge field value and use it after in the function.
# Examples
- Hide user reply using custom user answer function
- Replace user reply by component using custom user answer function
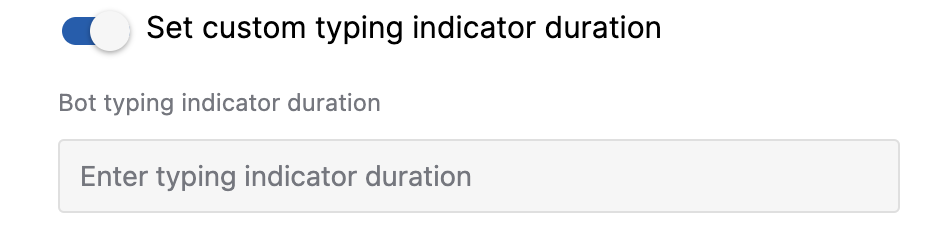
# Set custom typing indicator duration
Use this option to override global bot typing duration set in Wait for Chat (RWC) step. When the toggle is on you can set custom typing indicator duration, and it will be applied only for this message. Duration should be in timestring, e.g. 10s, 3000ms
# Override bot icon
Use this option to change bot icon that has been set globally in Wait for Chat (RWC) step. When the toggle is on you can set custom bot icon, that will be applied only for this message
![]()
# Conversation
By default, the Step inherits conversation from the previous Step on the Flow tree. To select a different conversation for a Step turn off the Inherit context setting. In the respective dropdowns choose the Bot name from your OneReach.ai account and the name of the Wait for Chat (RWC) Step where the conversation belongs too. As a result, the message will be sent to the selected conversation.
WARNING
Note that the conversation you selected manually for this Step will be automatically inherited by the next Step. If you do not intend it, change the settings of the Conversation section in the next Step in the Flow.
TIP
If you move or clone the Flow that has a Step with a manually selected conversation to another Bot or OneReach.ai account, re-set Bot and Conversation values for the Step because the Bot ID and the conversation ID will be different.
# Timeout settings
By default, the step will wait for 1 hour to receive a response from the user before proceeding down the next exit. The waiting time limits are between 15 seconds and 72 hours, and if no response is received after it ends, the flow will continue through the timeout exit. Examples of acceptable time formats: 3m 12s or 126sec.
# Merge field settings
The output data of the step will be stored under the name provided in merge field name. The content of the output depends on the choice of the input component, as well as on the type of user reply. The structure of the merge field object for each component, as well as for manual user response, is described in the input component field under the Info icon.
# Error handling
Process error is on by default and adds an error exit to the step. The flow will proceed down this exit if any error was encountered during the execution of the step (e.g. if the chosen conversation no longer exists).
# Reporting events
Step, Request Transcript and Response Transcript events are reported once the flow exits the step. They collect the data which can be used further in reports. You can specify tags to organize the collected data.