# Quick start guide
Here you can find guide how to set up chat, embed it on a web-site, etc.
# How to create Rich Web Chat
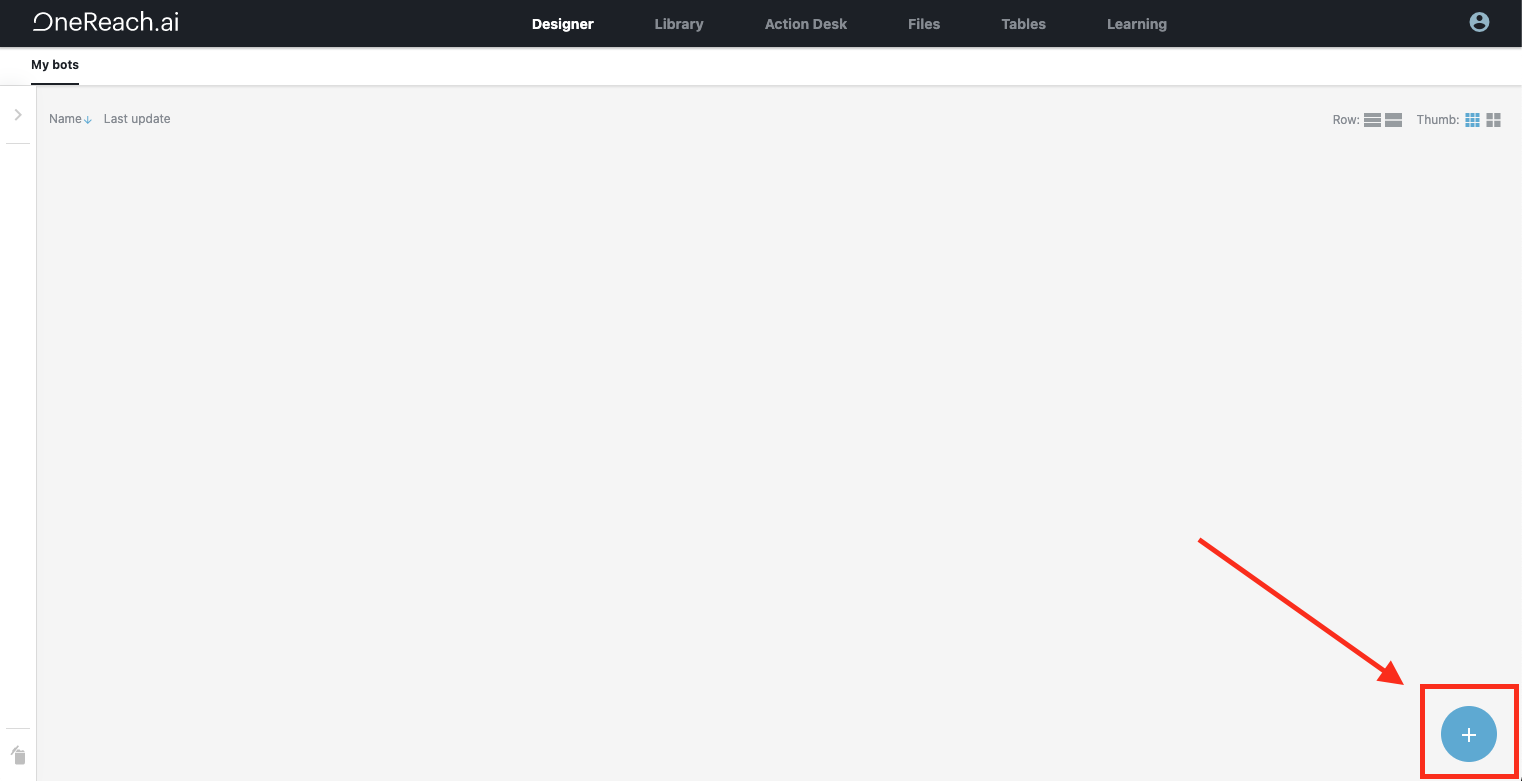
# Step 1: Create bot
Click on a + button in the right bottom corner of the flow builder and then select Add a blank bot.
TIP
You can also select Download from library and download pre-built bots with Rich Web Chat flows.
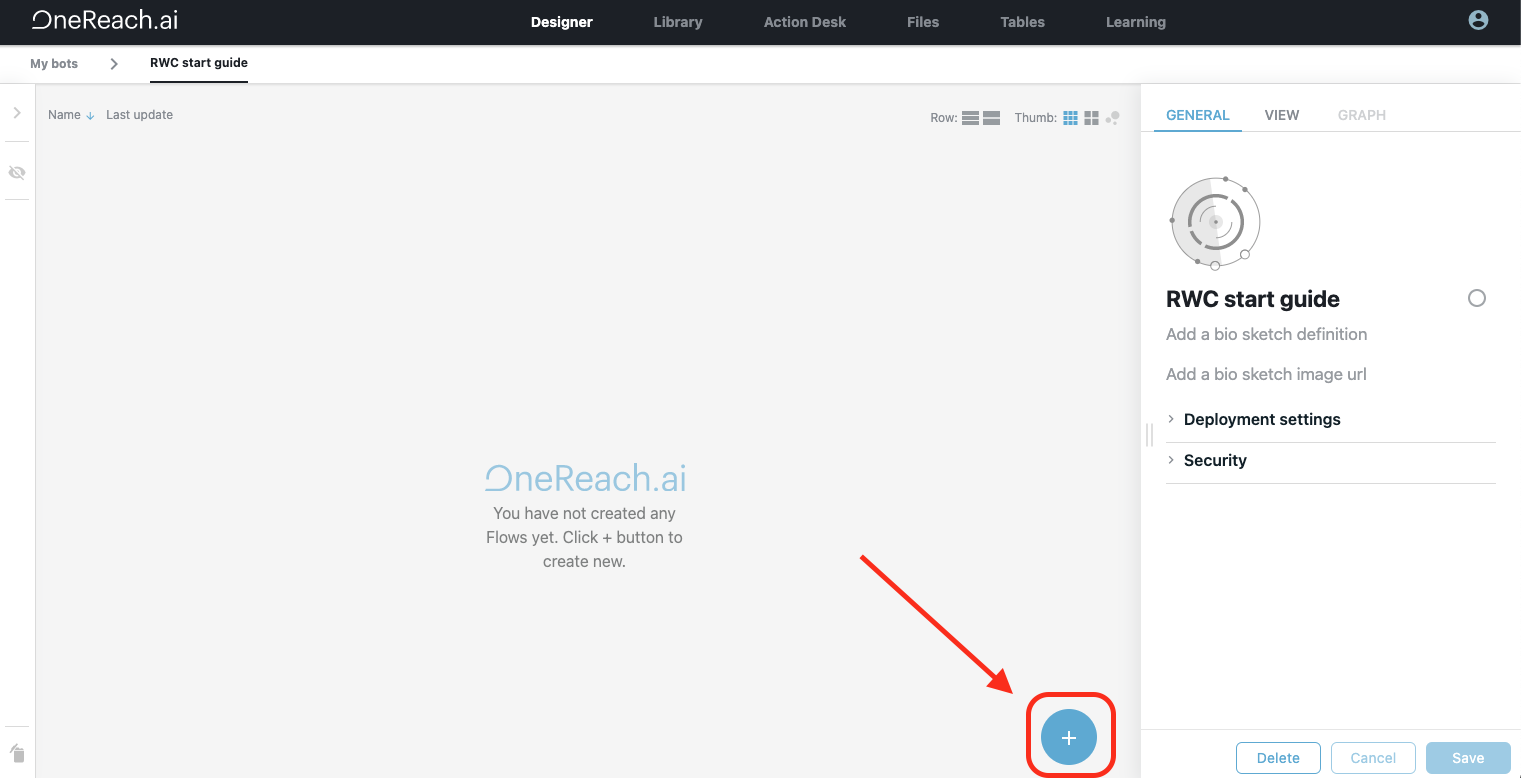
Next step is to set bot name and save bot, after saving we will be able to create a flow with Rich Web Chat.
# Step 2: Create flow
Now we can create a flow, click + button in the right bottom corner and select Add a blank flow.
After flow is created set flow name and click Save flow button.
# Step 3: Download Rich Web Chat step from library
In order to set up chat we need to download Rich Web Chat steps from steps library.
For simple demo we will need 3 steps:
- Wait for Chat (RWC) – this is the gateway step template, that starts a Rich Web Chat conversation.
- Request Response (RWC) – this step sends a message to an end user in a chat conversation and waits for a user response.
- Send Message (RWC) - this step to sends a message to an end user in a Rich Web Chat conversation without waiting for user reply.
In order to download these steps:
- Click on
TEMPLATEStab in right sidebar. - Click on a
Librarybutton at the bottom. - Type
rwcin search input at the top of the modal window. (Be sure you are on Library tab). - Find
Wait for Chat (RWC),Request Response (RWC),Send Message (RWC)steps and clickDownloadbutton. - Steps sucessfully downloaded, now you can close the steps library modal window.
After steps were downloaded you will see them in TEMPLATES tab in the right sidebar.
TIP
Be sure to download steps with the same minor version.
Example: Wait for Chat (RWC) v4.3.1 is compitable with Request Response (RWC) v4.3.1 and Send Message (RWC) v.4.3.0.
If you are using Wait for Chat (RWC) v4.1.9 consider downloading Request Response (RWC) v4.1.18.
# Step 4: Setting up Rich Web Chat
After steps are downloaded we can set up Rich Web Chat.
First we need to put Wait for Chat (RWC) step to a flow tree, this is a gateway step and always should be the first step in the flow. You can drag this step from TEMPLATES tab to a + area on the flow, or click on + area on the flow and select the step. (be sure you are on a Current flow tab).
Next we need set the step name, by filling Add step name input at the top of the right sidebar (step name will be used as merge field). Then in order to init Rich Web Chat we need to set the App name for our chat and Chat ID.
TIP
Note that App name and Chat ID values should be unique throughout your account.
# Step 5: Setting chat messages
Once we set up the Wait for Chat (RWC) gateway step, our chat does not have any messages yet, in order to send messages in chat we need to add Send Message (RWC) step.
Click on a + button under Wait for Chat (RWC) step on flow tree and select Send Message (RWC) step.
Once step is added to the flow, set up the step name in Add a step name input and message text in Text Message input. This text will be sent as message to a chat.
After message is sent to a chat flow will proceed through next leg.
Now, when user opens chat, he will recieve Hello! message. Lets add interactivity and send user message with a question and wait for reply.
In order to wait for user reply we need to use Request Response (RWC) step that sends message to a chat and waits until user answers.
So now we have the step that sends What is your name? message to a chat and waits until user replies.
Lets add another Send Message (RWC) step and send message with user replied name.
In order to use user reply in step we can access merge field of the previous Request Response (RWC) step by clicking on a {x} button in Text Message input and selecting waitForUserName.userReply.
Now our chat is fully set up, last thing we have to do is to activate the flow.
Click on a Save & Activate button in the bottom right corner of the sidebar.

After flow is activated click on a Wait for Chat (RWC) step on the flow tree and you will see two links to Rich Web Chat, copy RWC URL link and open the chat.
# How to embed Rich Web Chat into a website
In order to embed chat to your website click on a Wait for Chat (RWC) step and open the Embedded chat customization collapsible group, then scroll to the bottom and click on a Show button. After that modal window with code emample will be opened.
Open your website and click on a Rich Web Chat widget in the right bottom corner of the website.
👏 Congratulations, you've successfully embedded Rich Web Chat to your website!