# Create your first Rich Web Chat
# What we are going to do
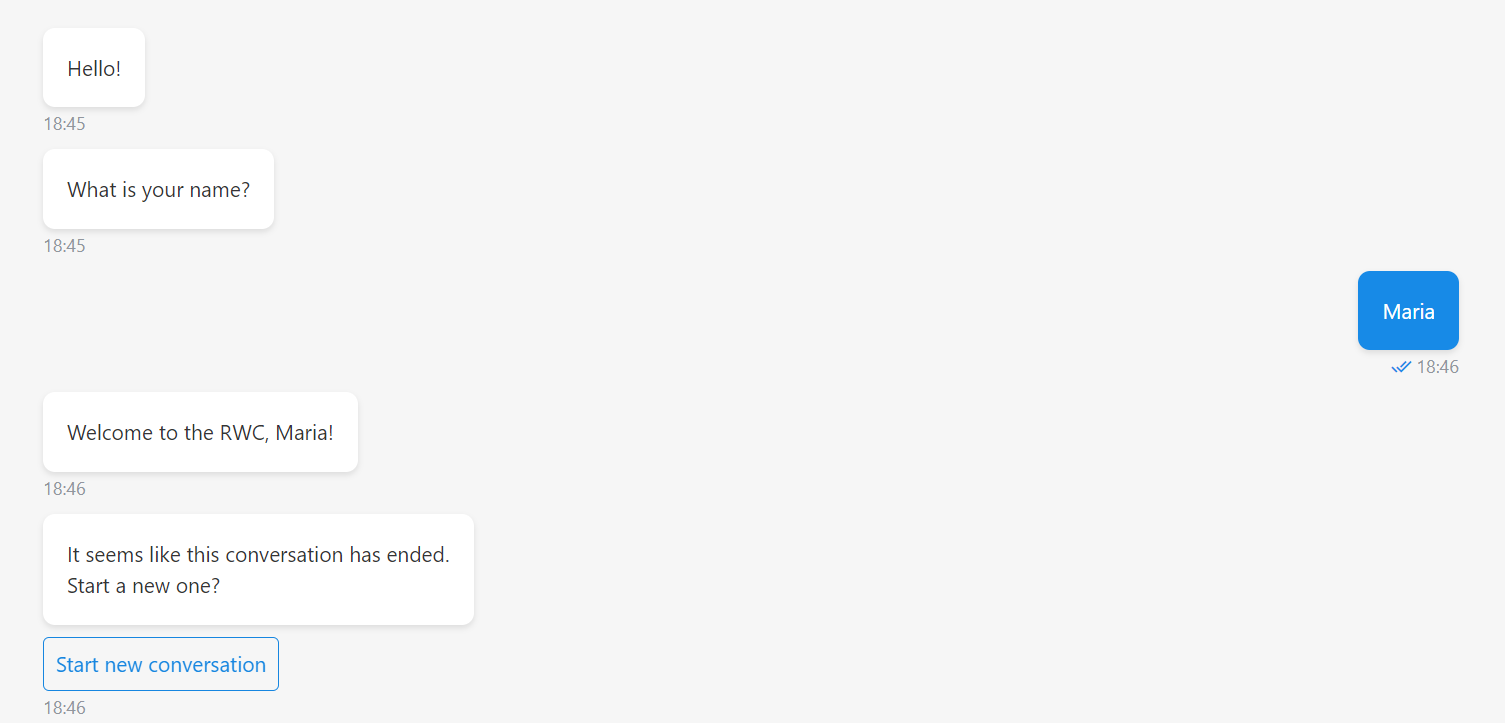
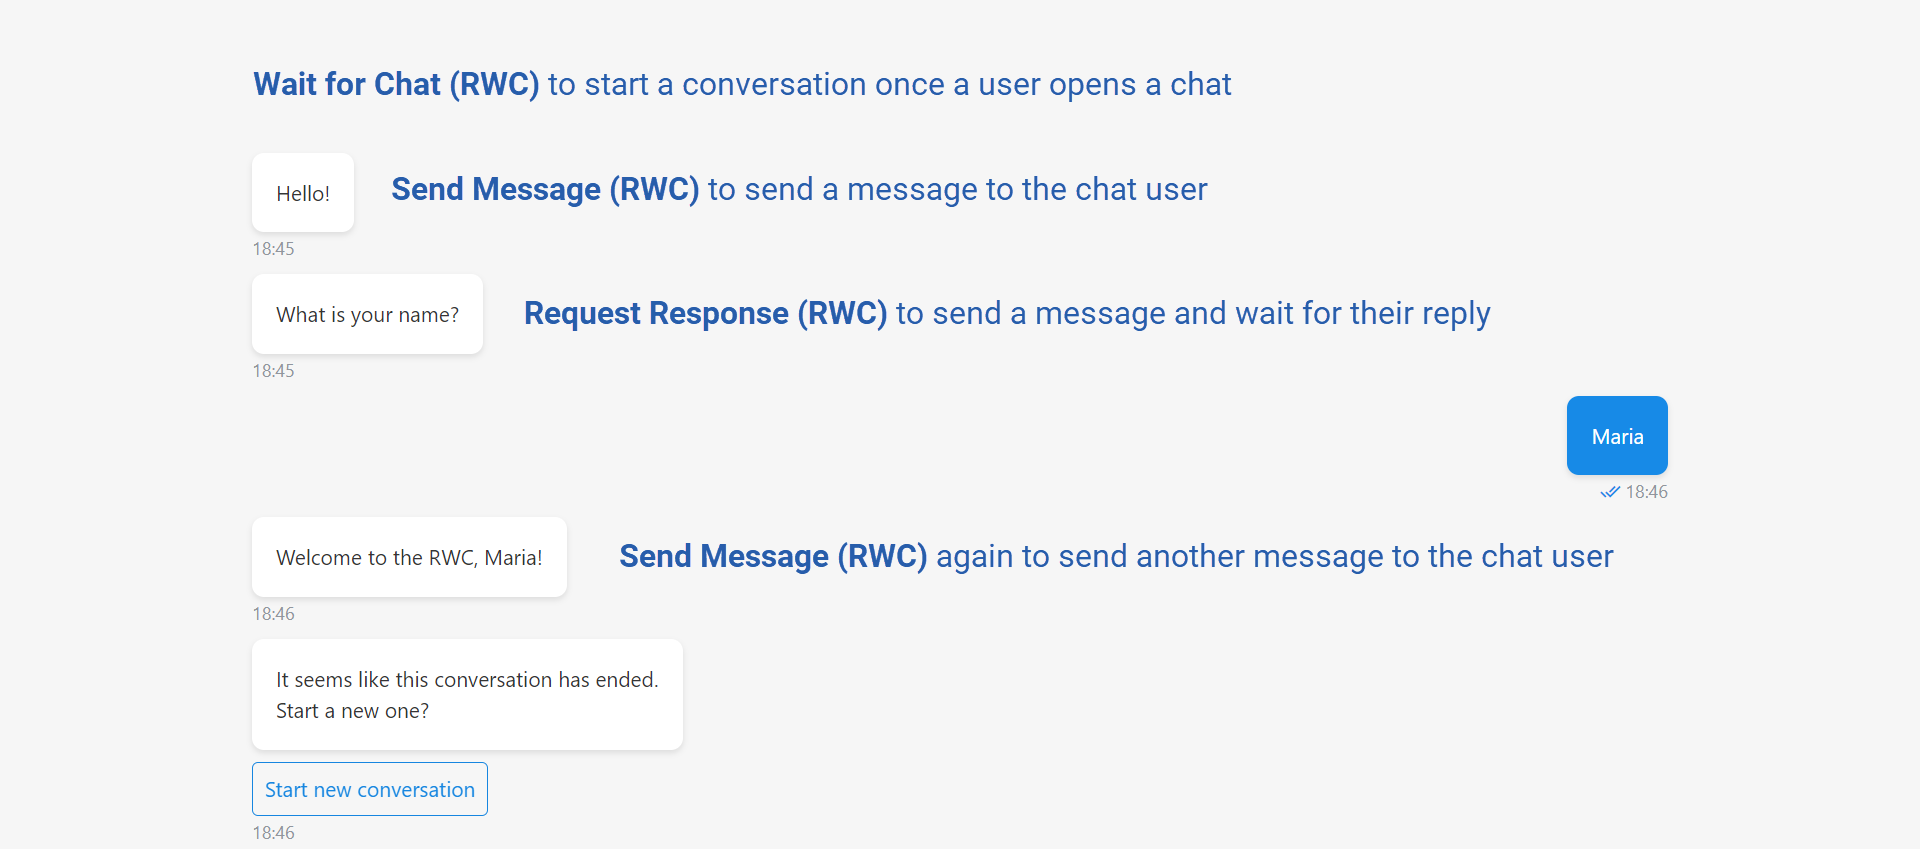
Let's build a simple chat that greets a user, asks their name, and welcomes them by their name. Our expected result looks like this:
This guide gives step-by-step instructions for building this chat. We are going to:
- Create a Bot in the Designer
- Create a Flow in this Bot
- Download three RWC Step templates from the Library to this Flow
- Build a Flow tree with these Steps
- Activate the Flow
- Open and use the chat
# Prerequisites
You need to have an account in OneReach.ai.
Log in.
# Instruction
# Create a Bot in the Designer
- In the Navigation bar, open the Designer.
- Click the blue Plus button.
- Choose Add a blank bot.
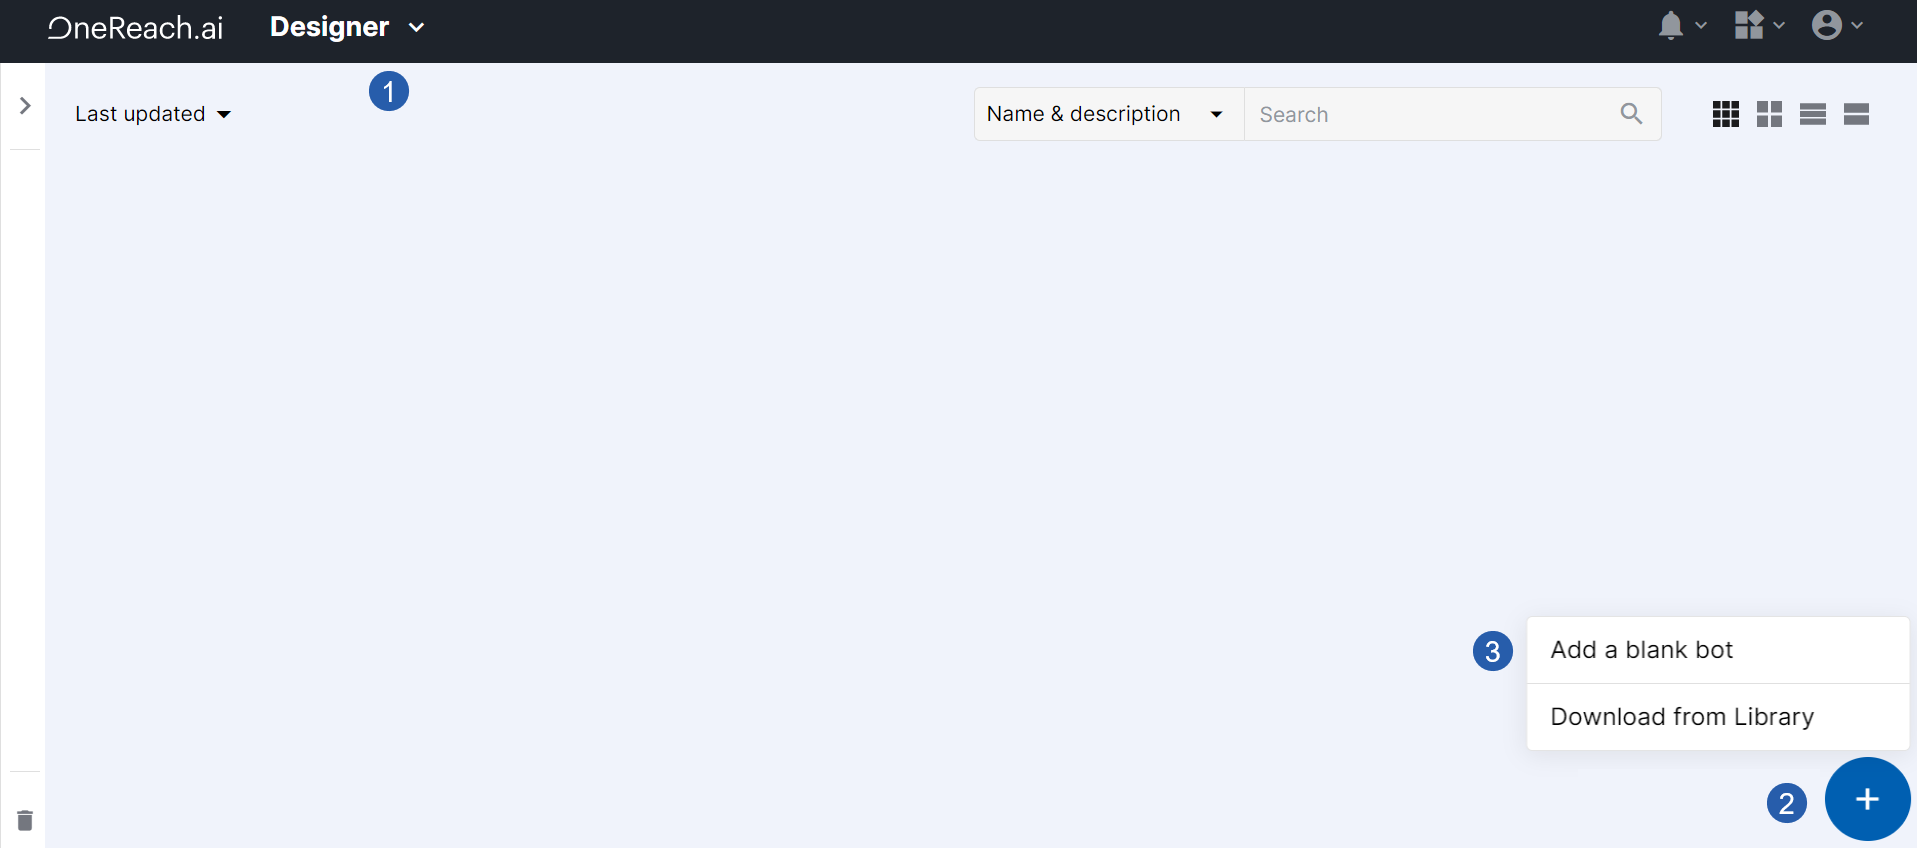
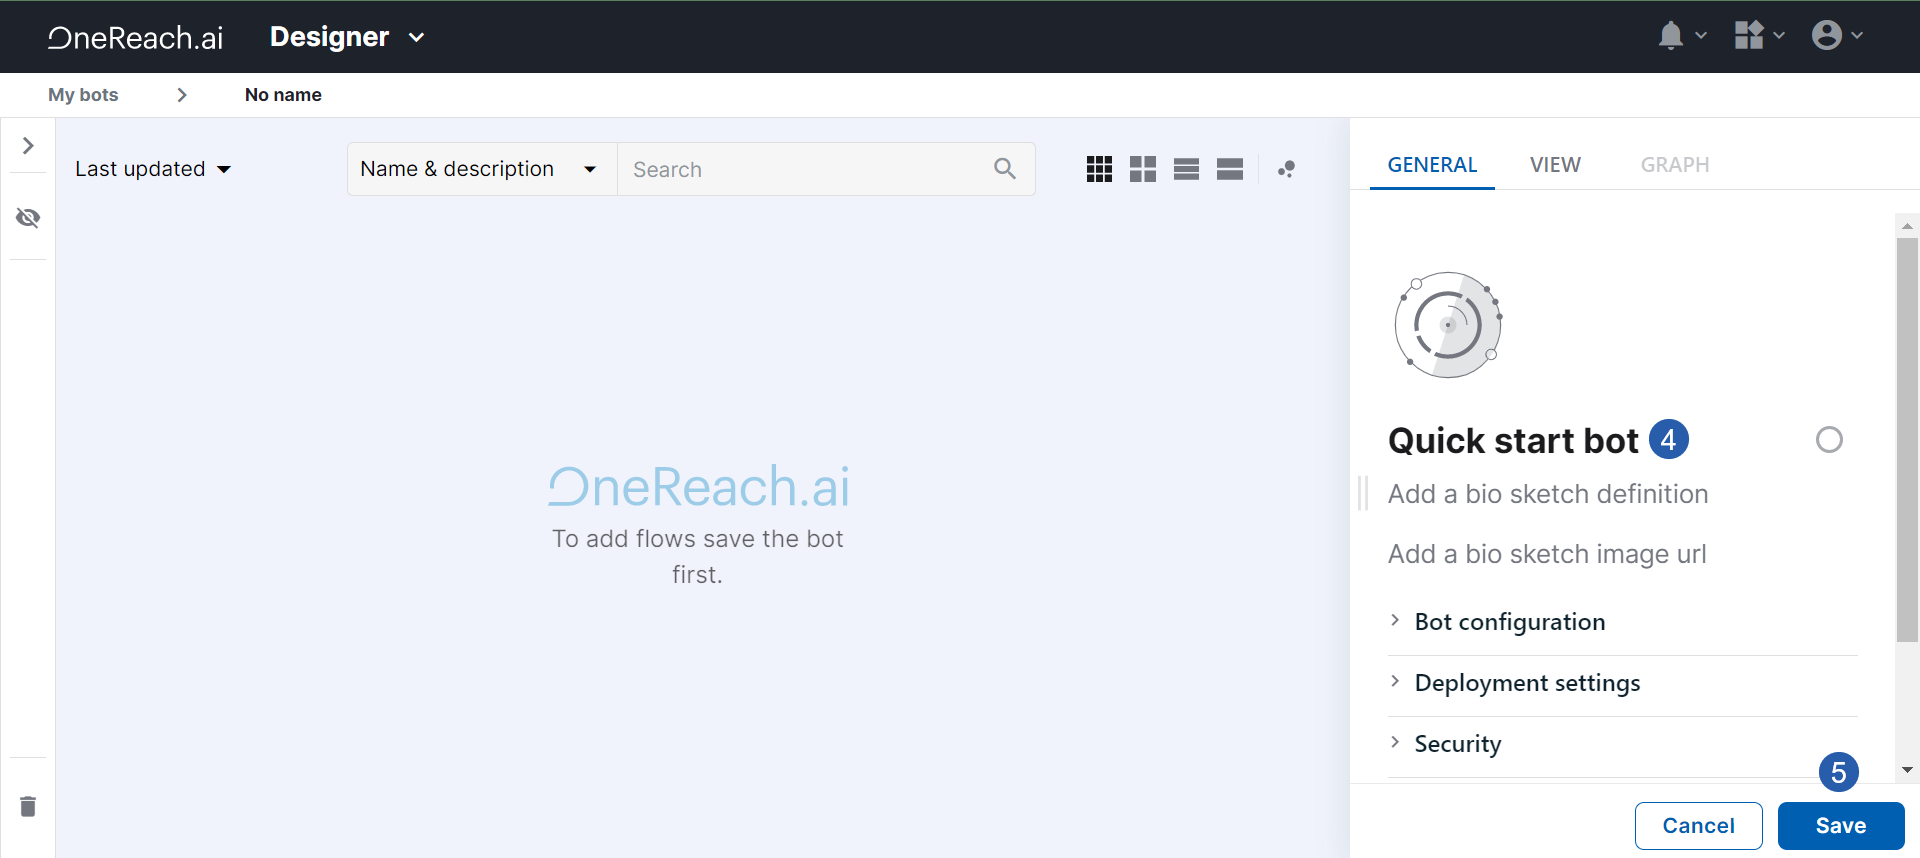
- Add a Bot name.
- Click Save.
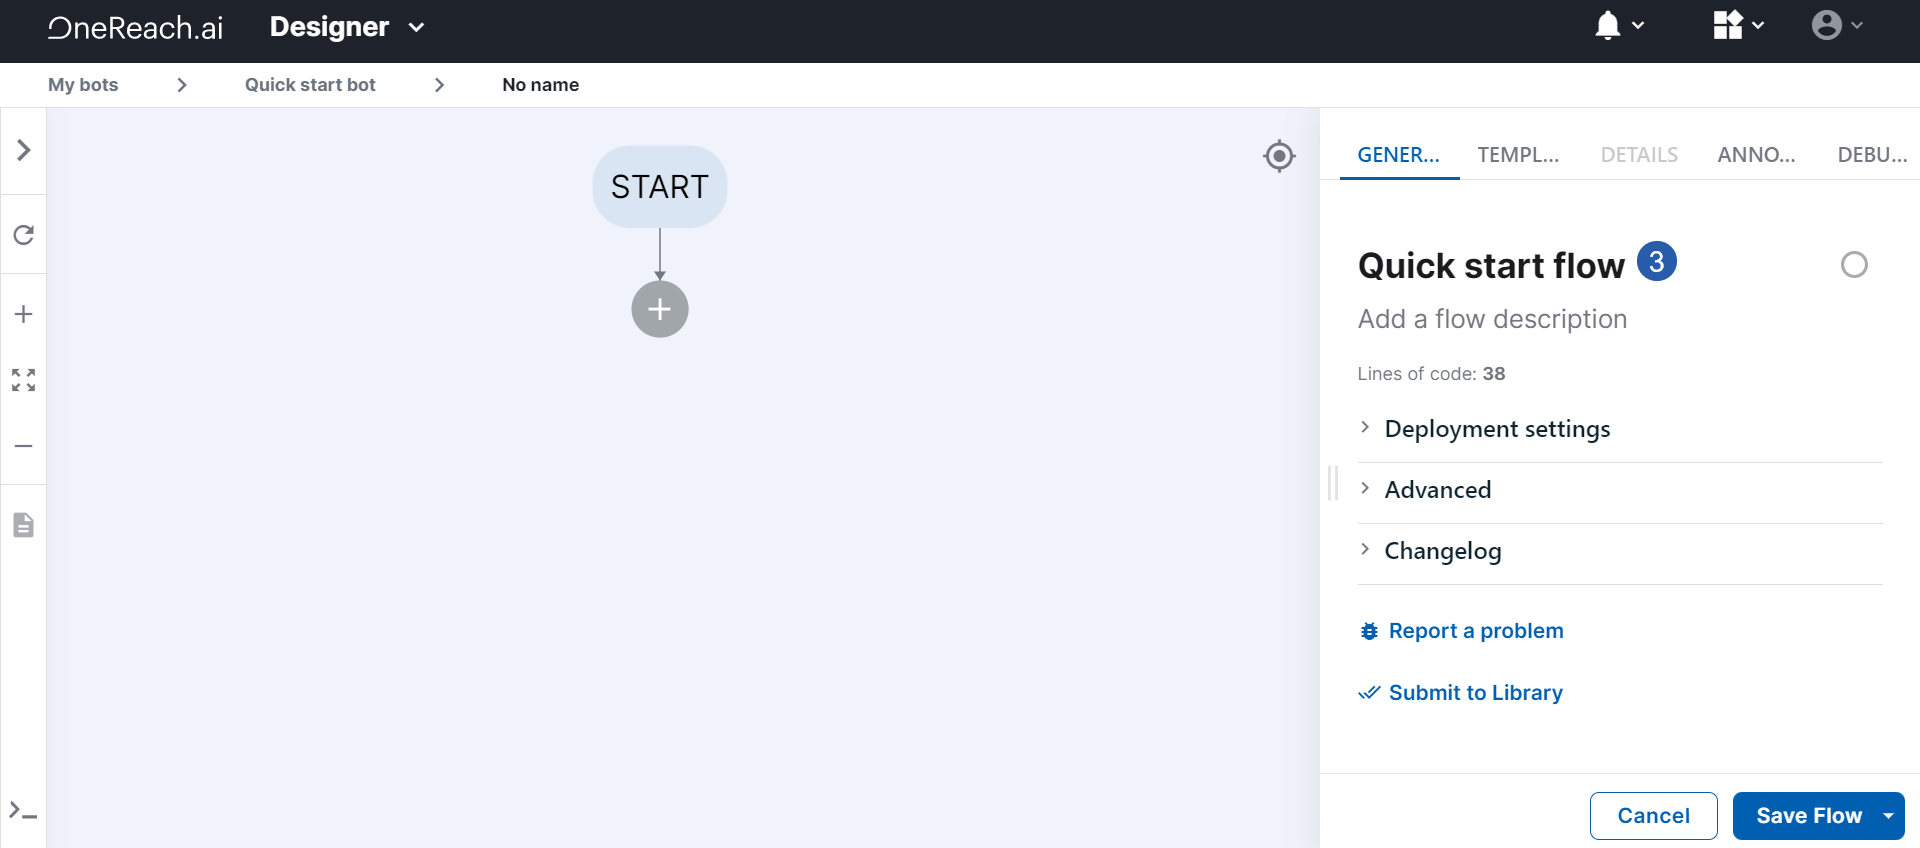
# Create a Flow in the Bot
- Click the blue Plus button.
- Choose Add a blank flow. A Flow opens.
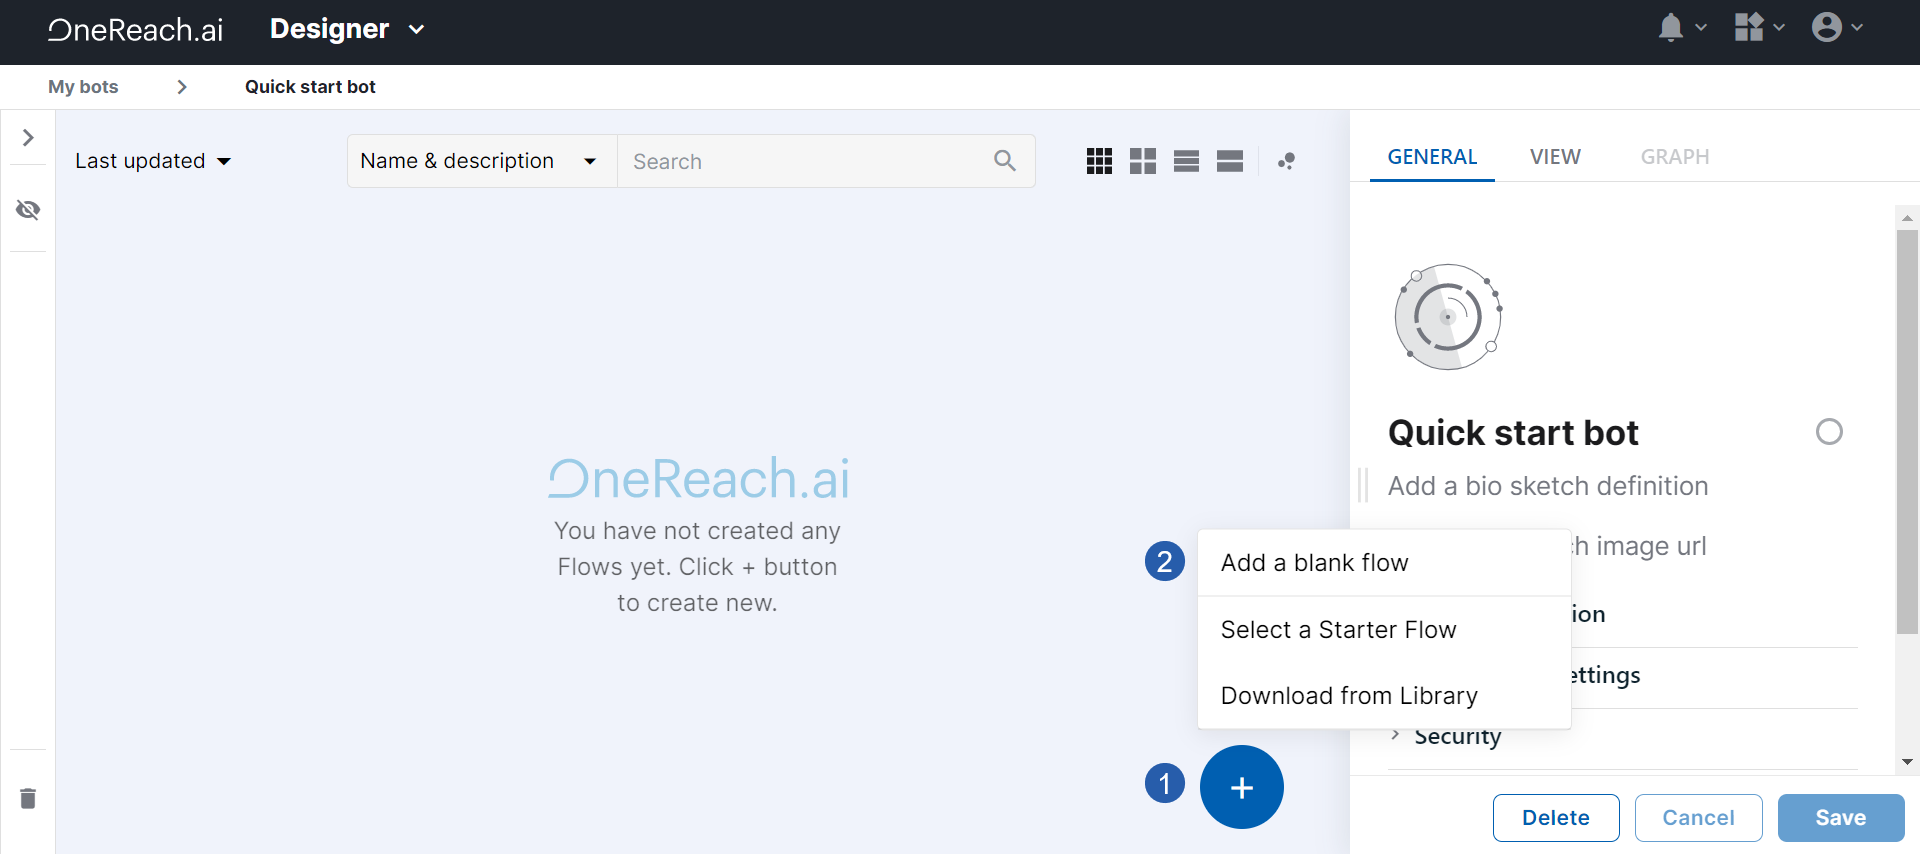
- Add a Flow name.
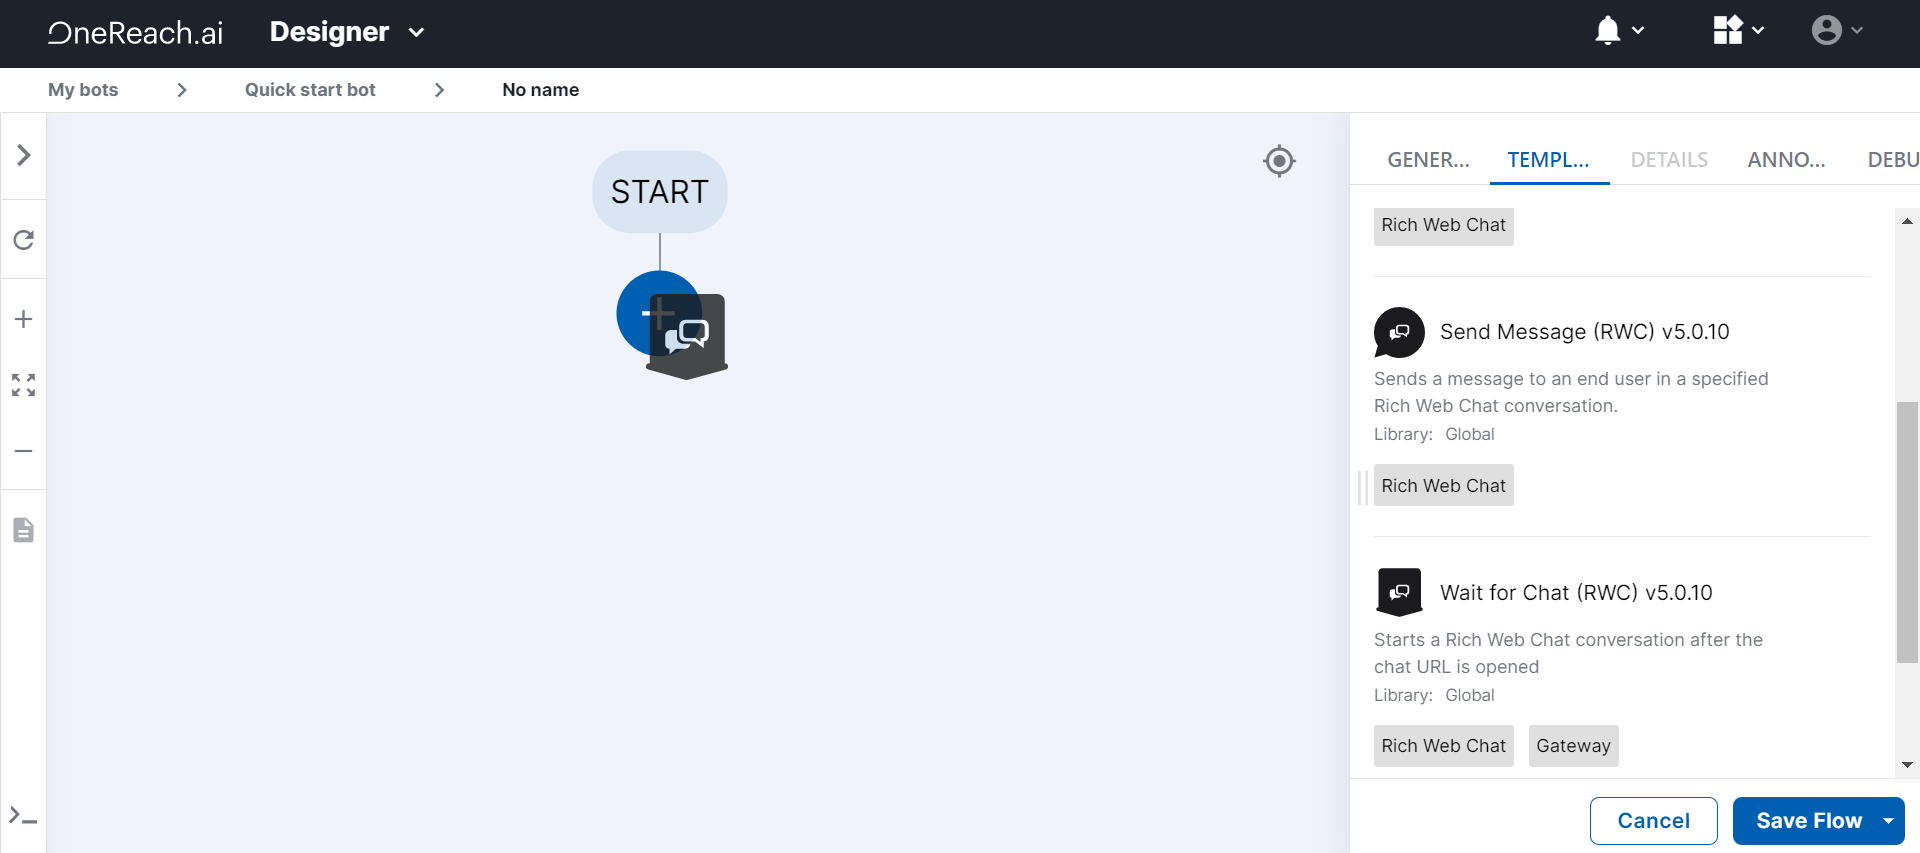
# Download three RWC Step templates from the Library to this Flow
To build this chat, you need the following Step templates:
- Wait for Chat (RWC)
- Request Response (RWC)
- Send Message (RWC)
To download them from the Library to your Flow:
- Open the Templates tab.
- Click Library down the tab. The Library iFrame opens.
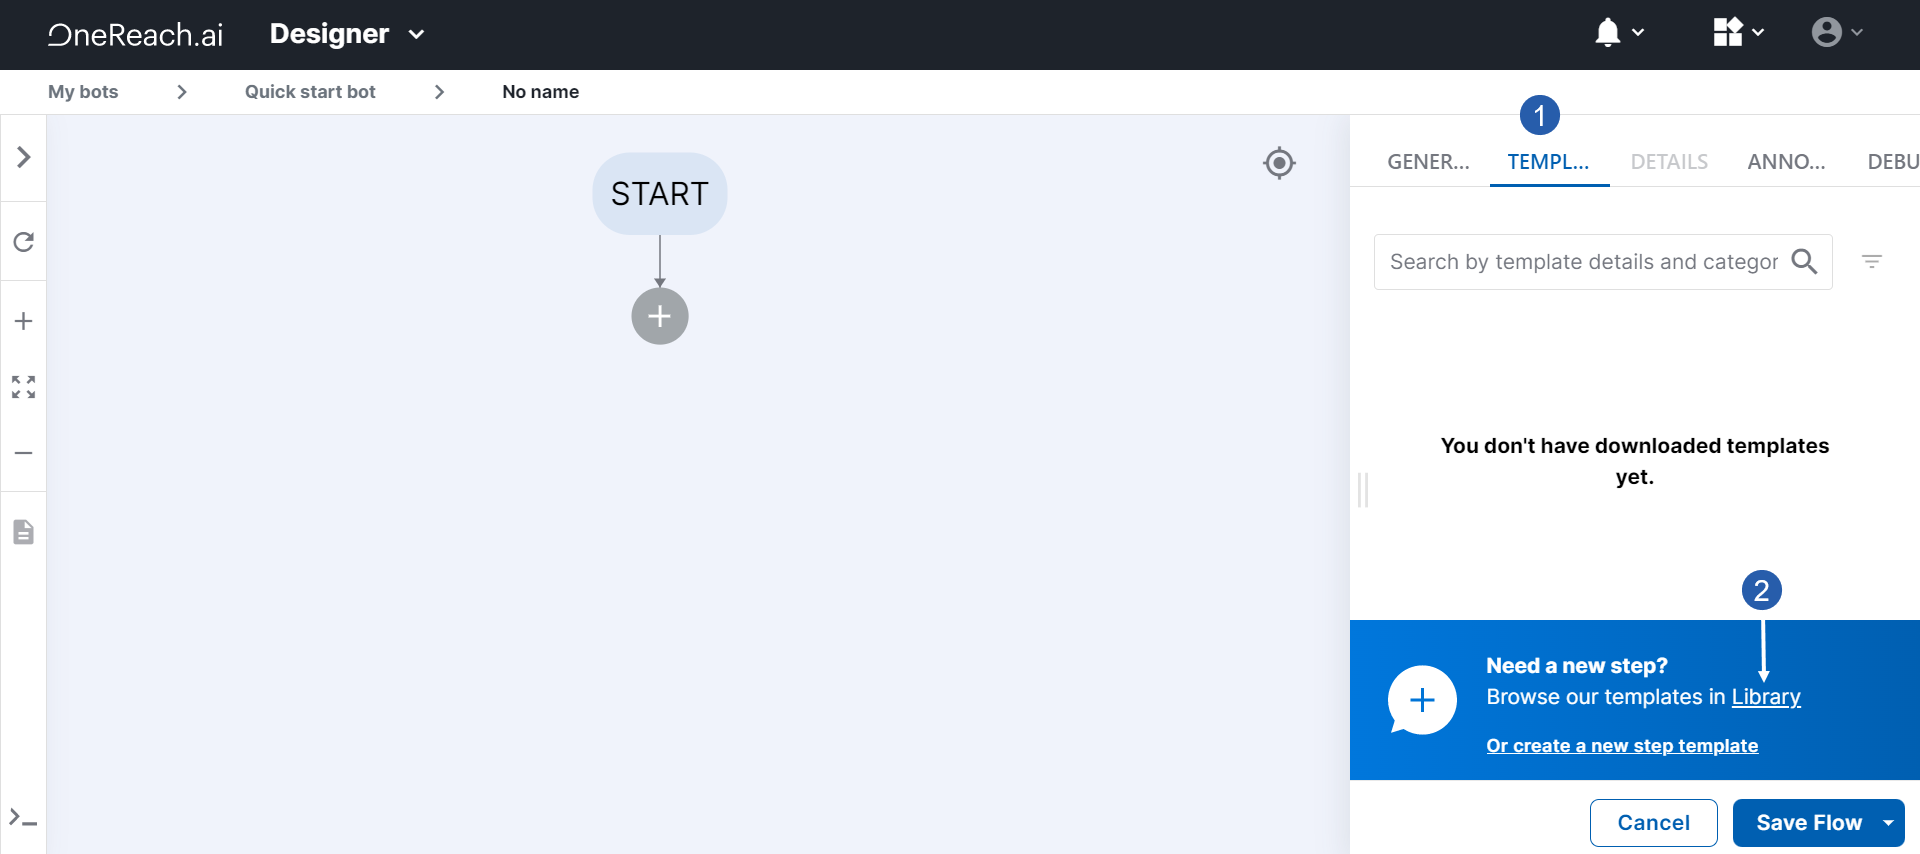
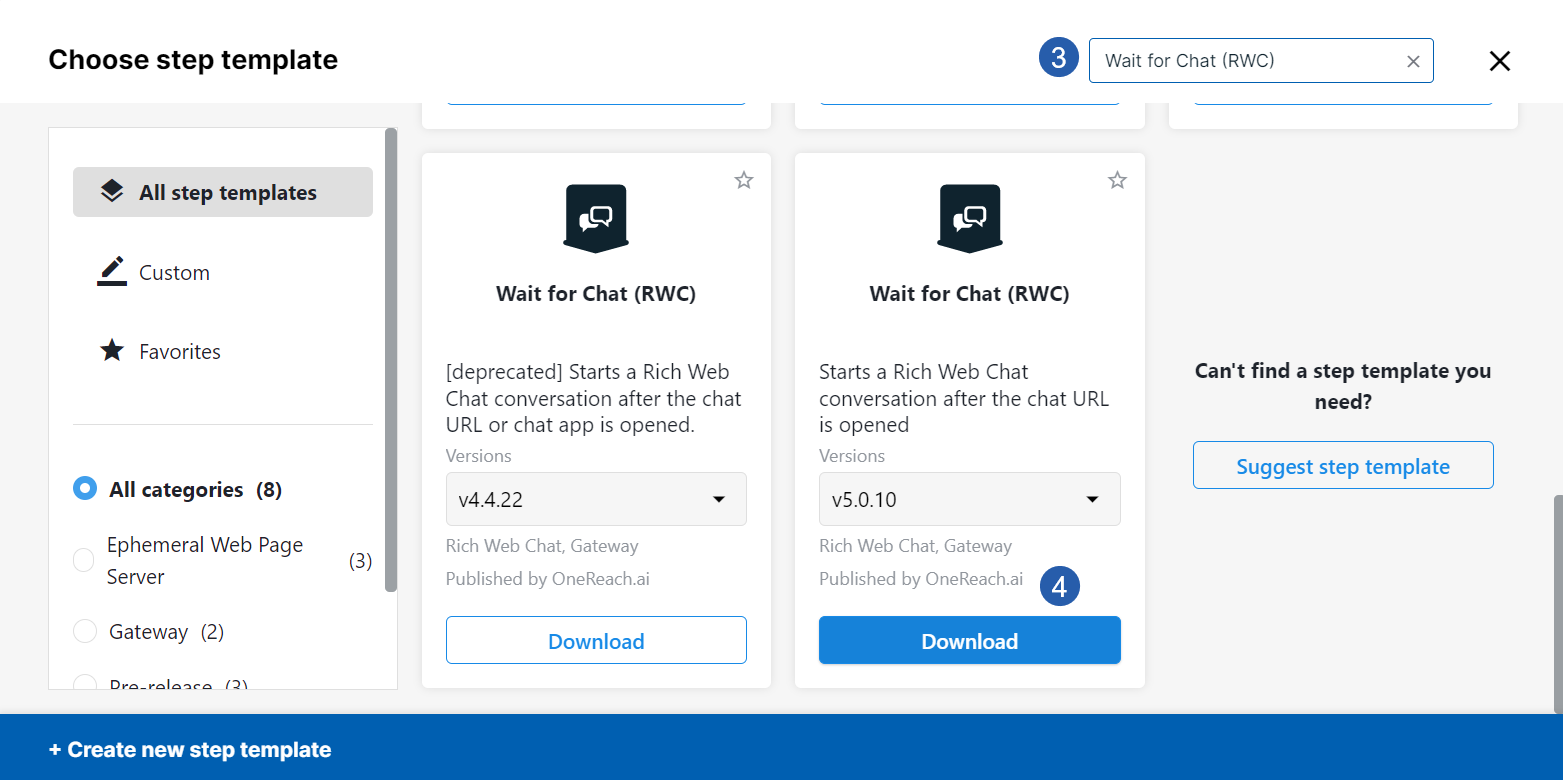
- In the search field, paste the Step template name. Scroll through search results if needed.
- Click Download for the Step template of interest.
TIP
If several versions of the Step template are available to download, choose the latest.
 5. Close the Library iFrame.
After downloading the three necessary Steps templates, you see them in your Flow in the Templates tab.
# Build a Flow tree with these Steps
To start a chat, configure the Wait for Chat (RWC) Step:
- From the Templates tab, drag the Wait for Chat (RWC) Step to the Canvas.
- Add a Step name.
- Write an App name.
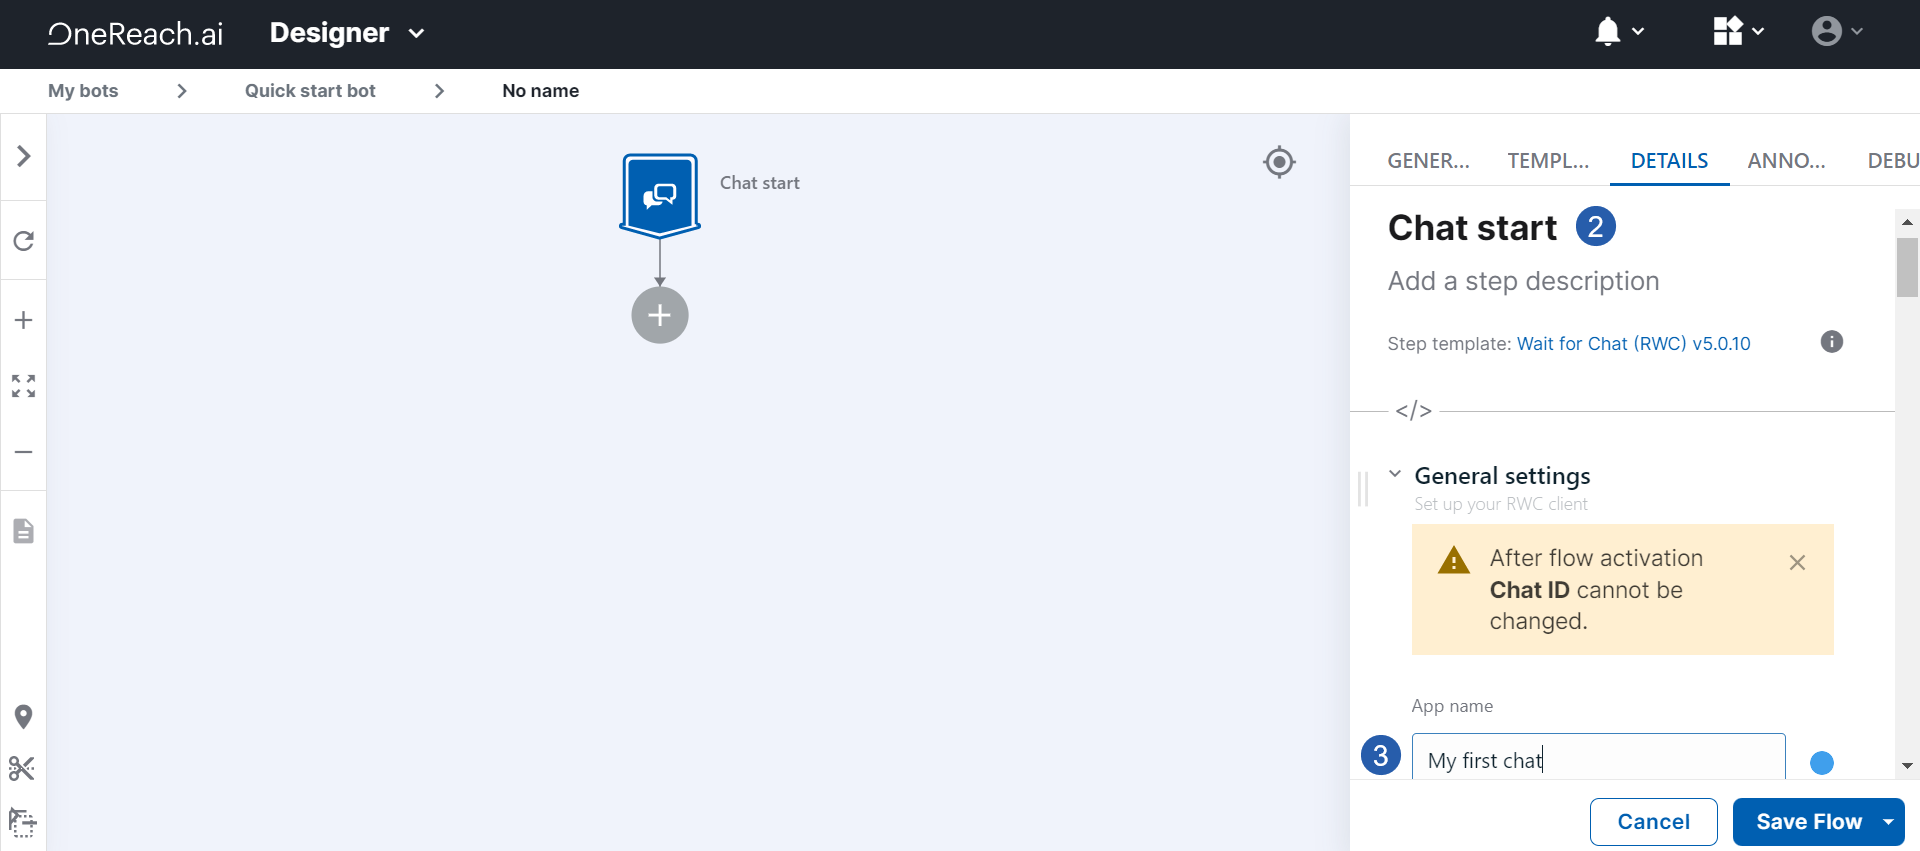
- From the Templates tab, drag the Wait for Chat (RWC) Step to the Canvas.
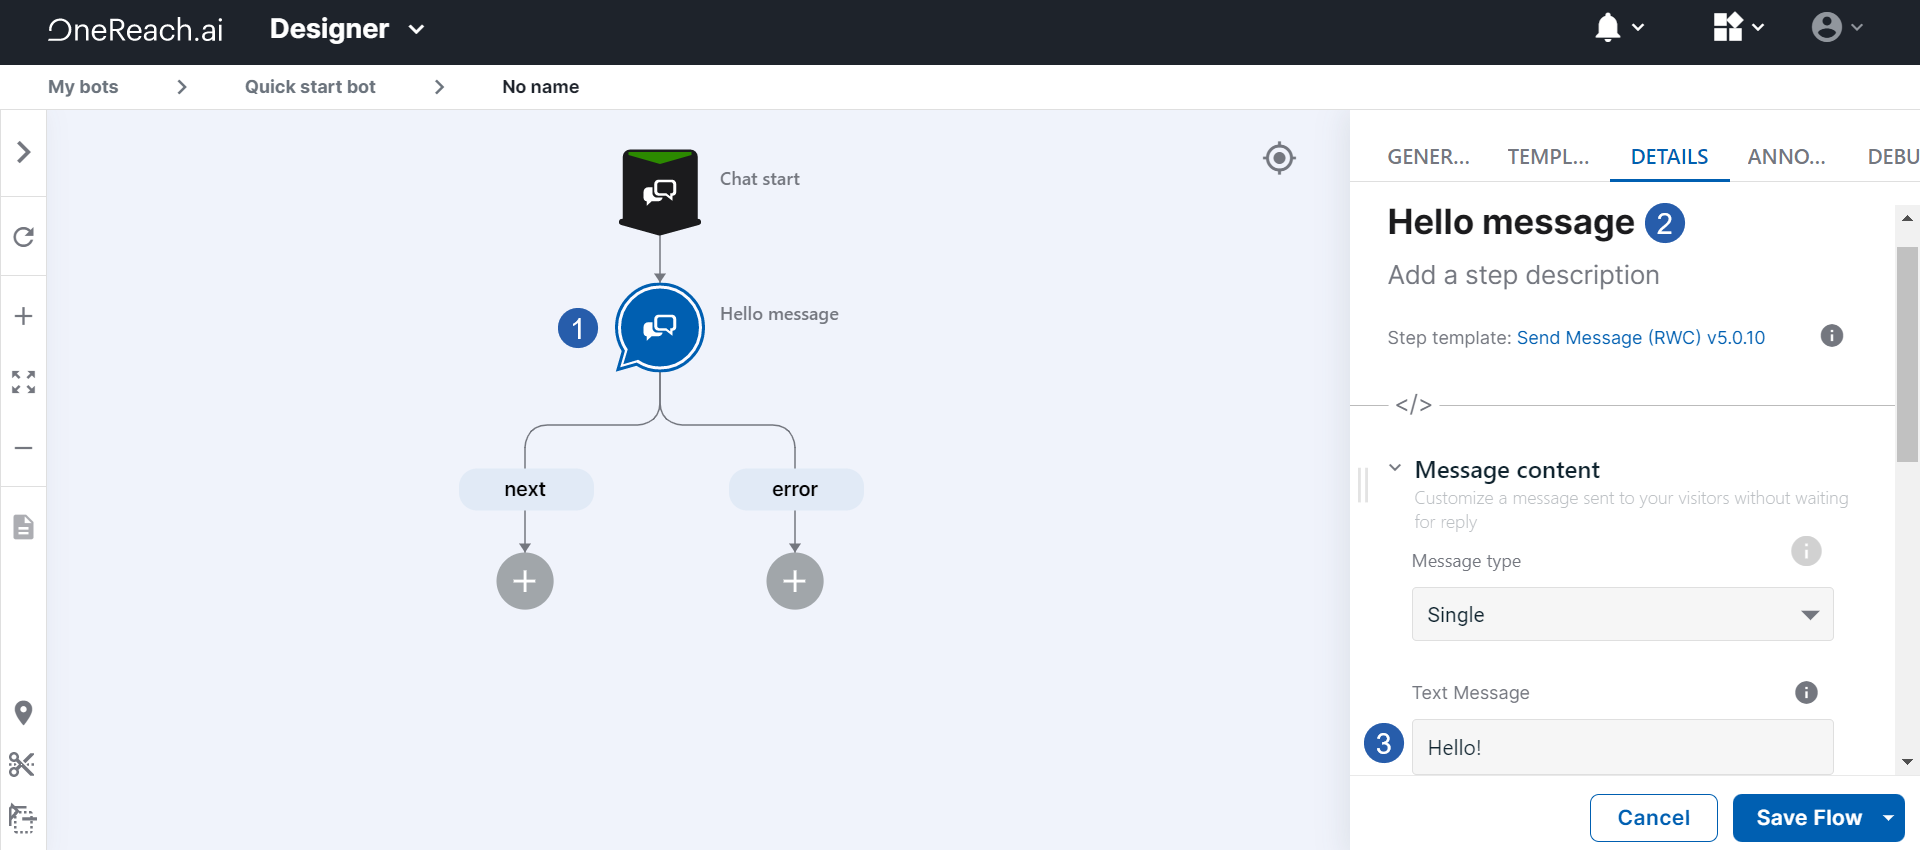
To welcome a chat user, configure the Send Message (RWC) Step:
- From the Templates tab, drag the Send Message (RWC) Step to the Canvas.
- Add a Step name.
- In the Text Message field, write a greeting to a chat user.
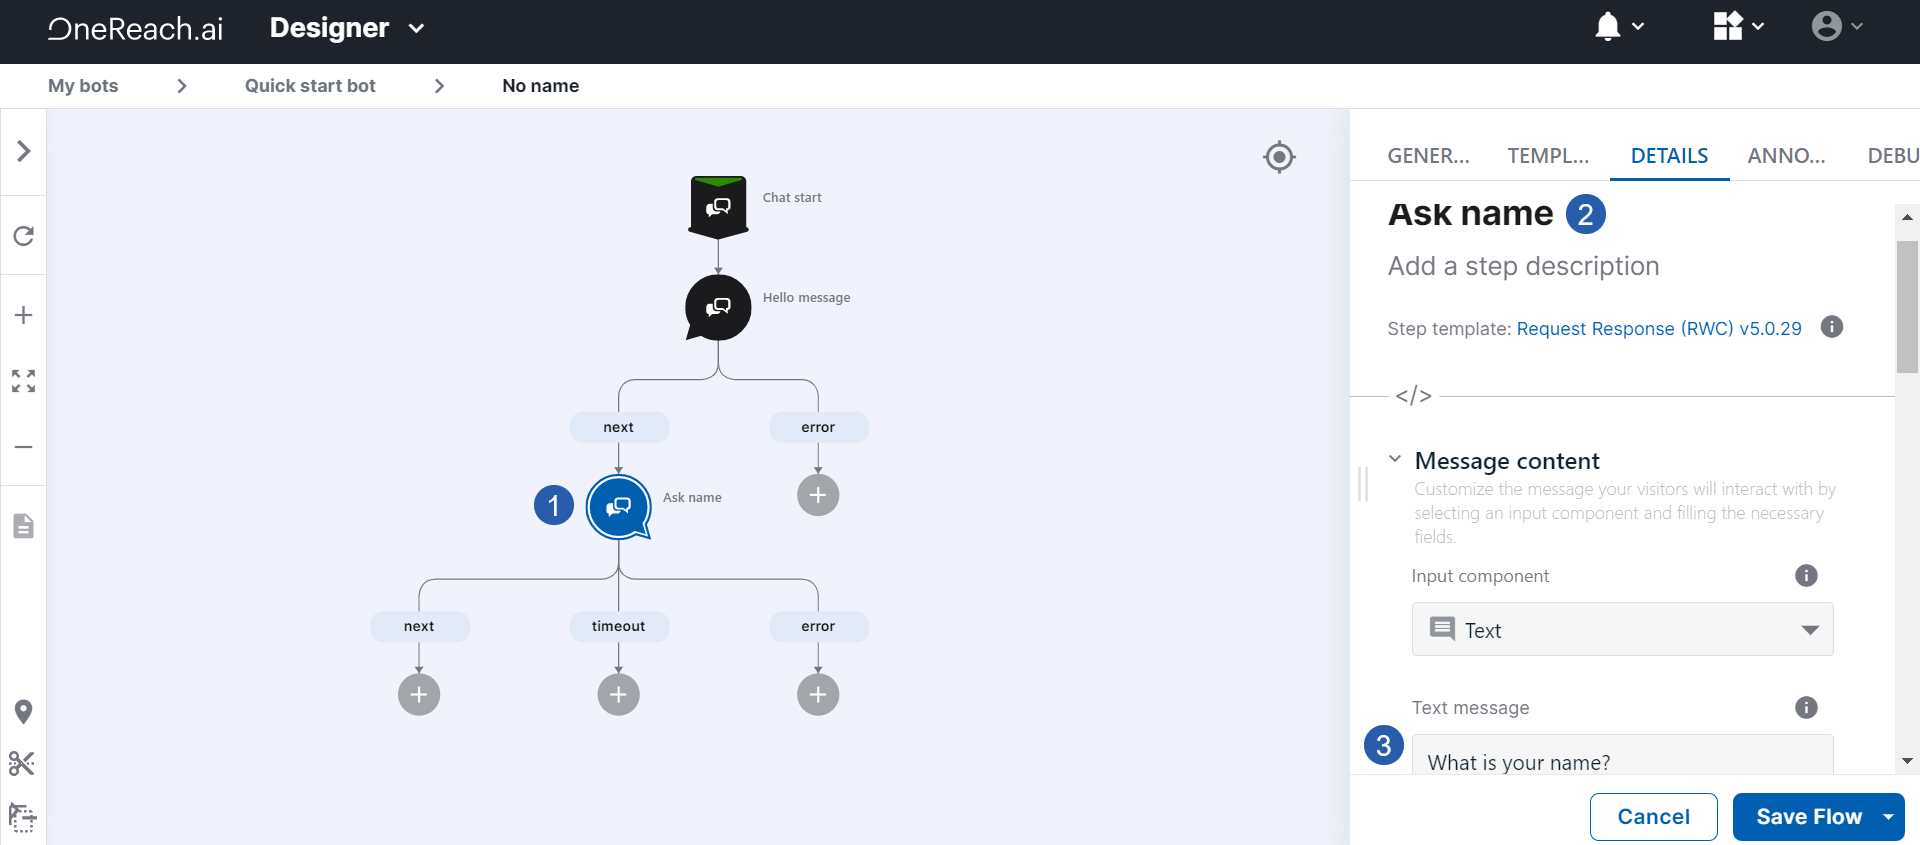
To ask the chat user a question and get their answer, configure the Request Response (RWC) Step:
- From the Templates tab, drag the Request Response (RWC) Step to the next leg on the Canvas.
- Add a Step name. For example, "Ask name".
TIP
As you might have noticed, every Step requires a name. The platform takes Step names to form Merge fields. It is what we call variables that pass data from Step to Step in the Flow. Further in this instruction, you can see how we pass and use the data from this Step in the next one.
- In the Text Message field, write a question to a chat user: "What is your name?"
To reply to a chat user with a message containing data from their answer, configure the Send Message (RWC) Step:
- From the Templates tab, drag the Send Message (RWC) Step to the next leg on the Canvas.
- Add a Step name.
- In the Text Message field, write a welcome message.
- Click the Merge field icon {x}.
- To personalize the message, we add a variable with the user's name we got in the previous Step. In the drop-down list, find a Merge field that contains the name you gave to the Request Response (RWC) Step. In our example, it is
askName.userReply.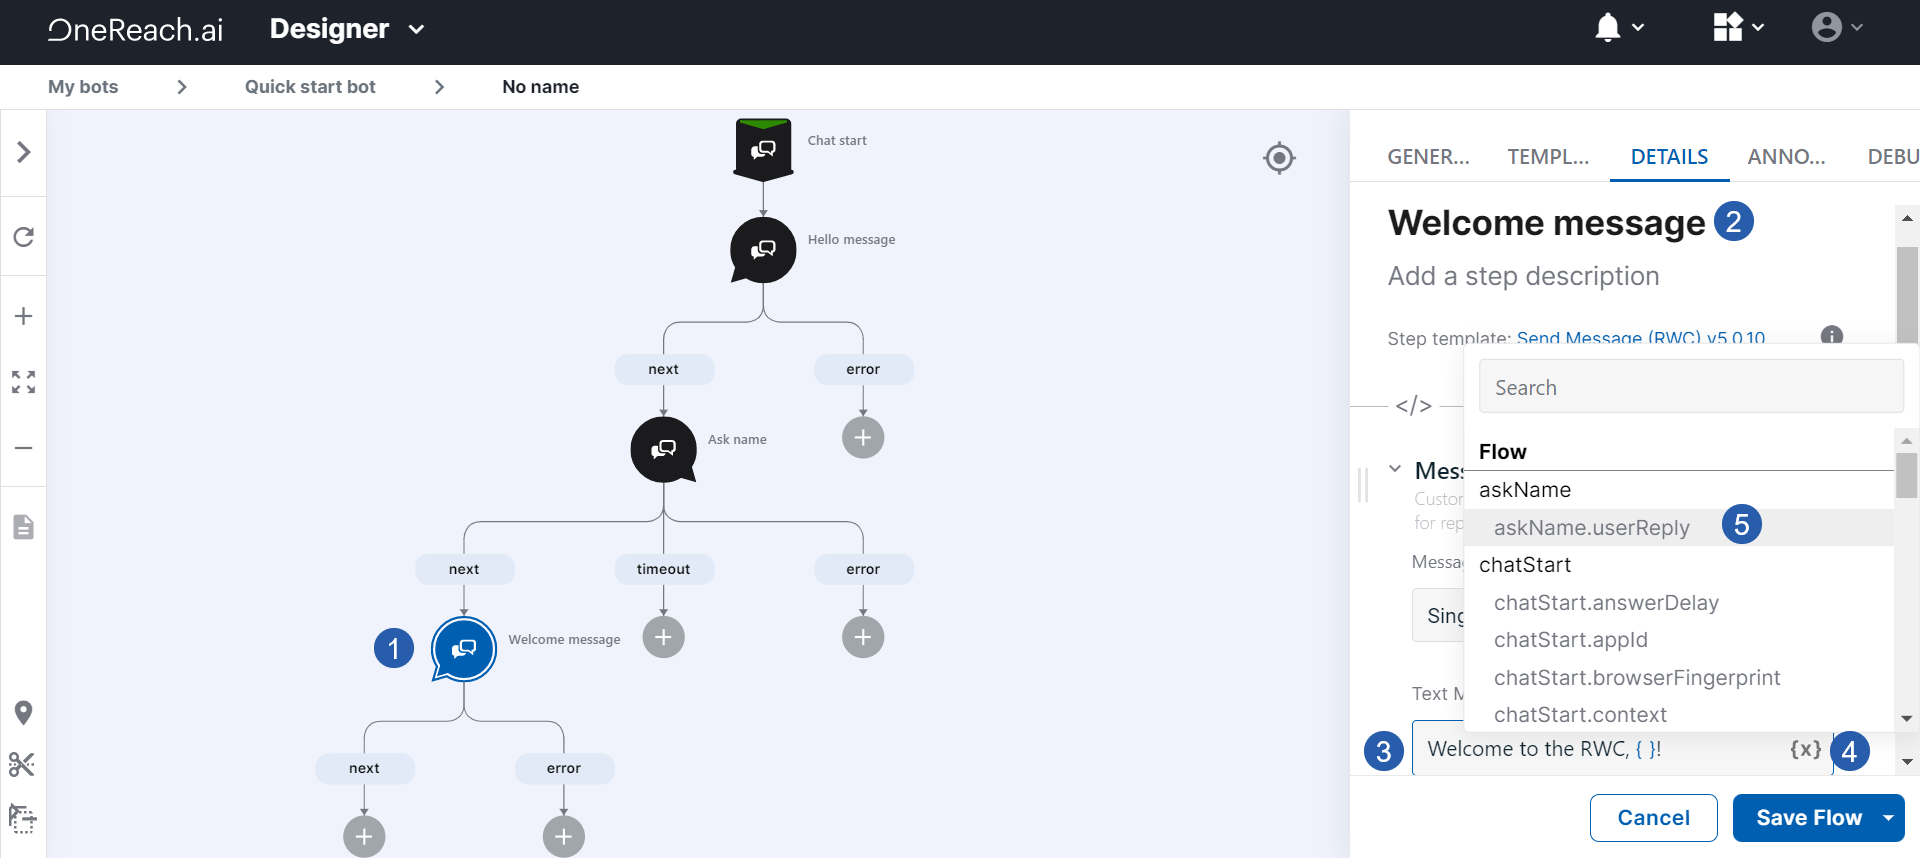
# Activate the Flow
- On the Save Flow button, click the arrow to expand the menu.
- Choose Save & Activate. It might take a bit of waiting.

# Open and use the chat
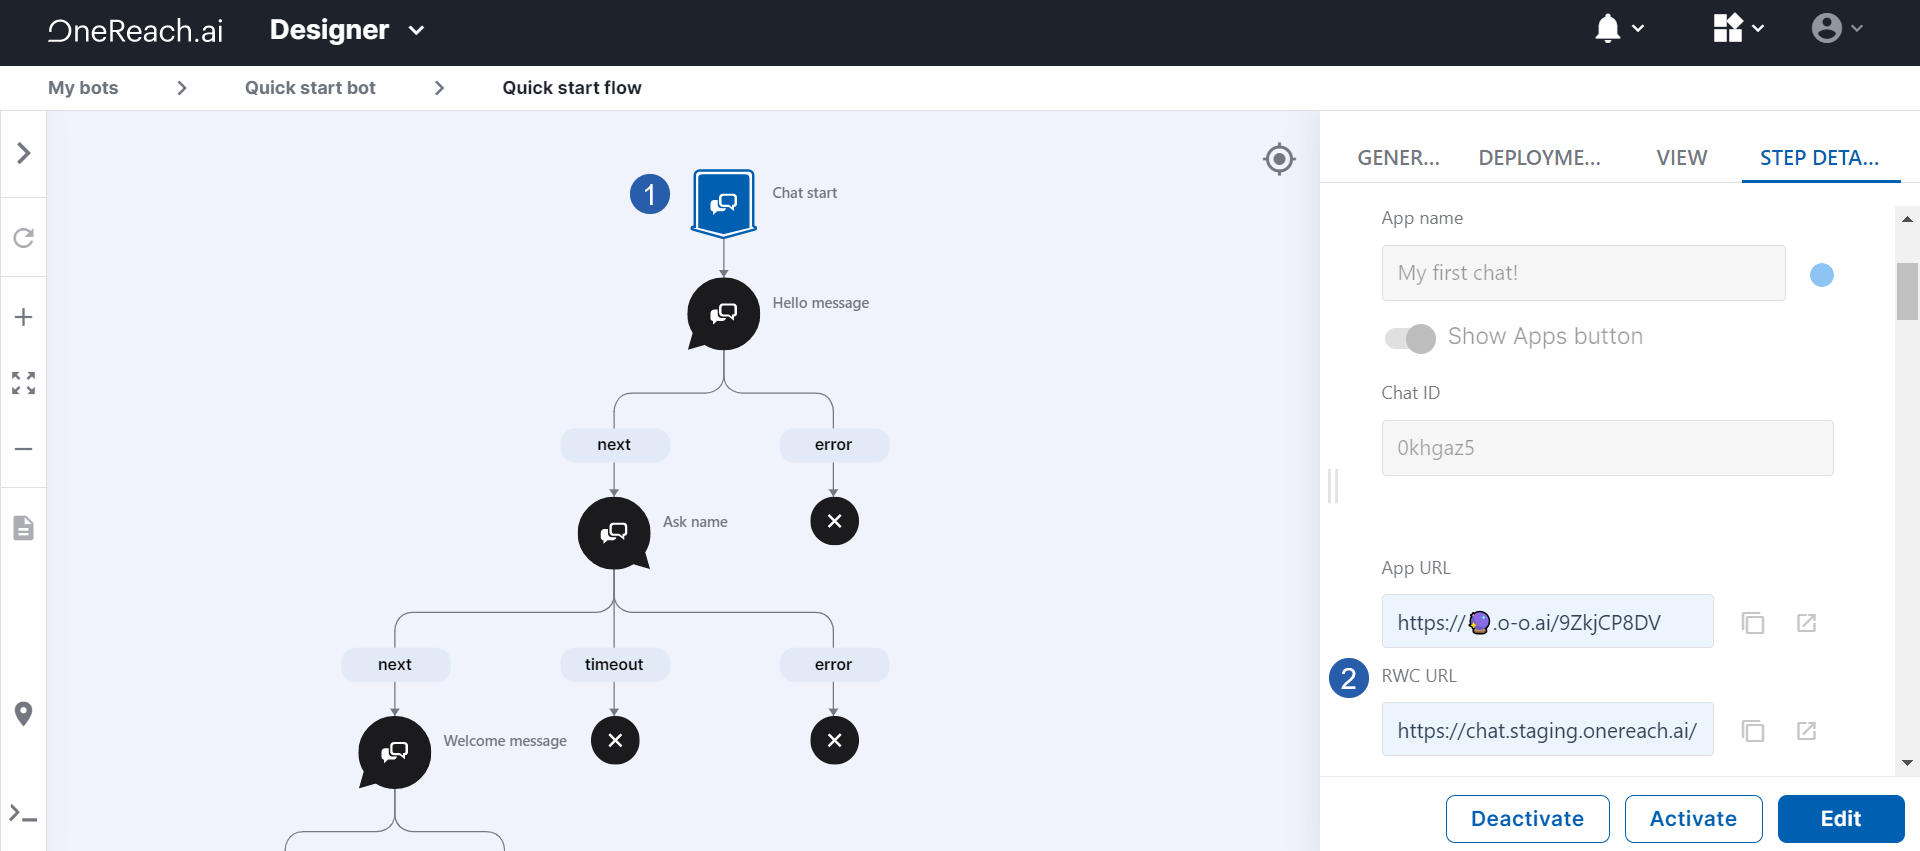
- Click the first Step on your Flow tree, which is Wait for Сhat (RWC).
- Scroll to the Rich Web Chat settings section and find the RWC URL field. It becomes available only after Flow activation. Next to it, click
 .
.
# Result
Your Rich Wed Chat opens on a new web page. Loading the chat might take some time.
Try it out!
 You have built your first Rich Web Chat.
You can use the RWC not only on a new web page but also embed it into your website. To try this functionality, follow the Embed your RWC into a web page quick-start guide.